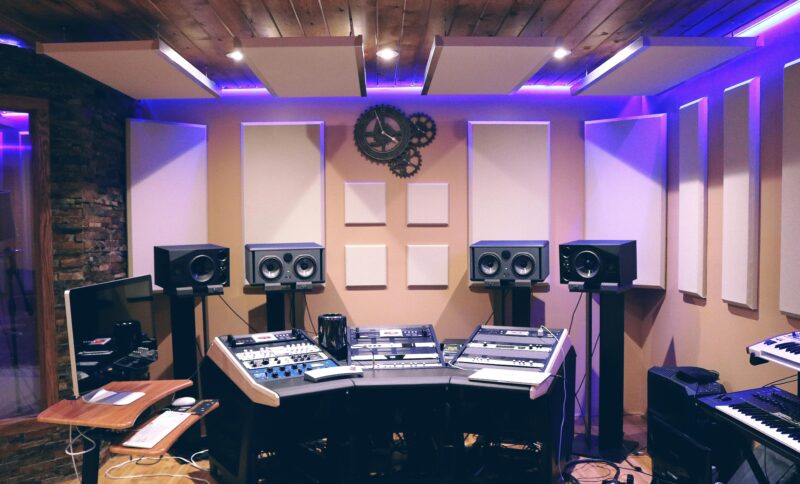
Setting up a music studio at home is an exciting venture that allows you to explore your creativity and produce music right from the comfort of your own space. Whether you’re a budding musician, a seasoned producer, or just someone who loves to play guitar and create, having a dedicated space for your music can make all the difference. In this guide, we’ll walk you through the essential steps and equipment needed to create your home studio. So grab your headphones, and let’s dive into how to set up a music studio at home!
Understanding Your Space
Before you start purchasing equipment, it’s crucial to evaluate your available space. Setting up a recording area is both a technical process and an art, requiring thoughtful planning to achieve the best results. and setup you need often depends on the genre of music you plan to record, since each genre has unique sound and production requirements. Consider the following factors:
- Room Size: The size of your room will dictate what equipment you can fit and how sound behaves in that space. A smaller room may require some acoustic treatment to minimize echoes and improve sound quality.
- Noise Levels: Identify potential noise sources like traffic or neighbors. If possible, choose a quieter area of your home to minimize interruptions during recording sessions.
- Layout: Think about how you want to arrange your equipment. A good layout will help with workflow and comfort during long sessions.
Essential Equipment for Your Home Studio
Now that you’ve assessed your space, it’s time to gather the essential equipment for your music studio. Here’s a list of what you’ll need:
1. Computer
Your computer is the heart of your home studio. It will be used for recording, editing, and mixing your music. Here are some tips for choosing the right one:
- Processor: Look for a multi-core processor, such as an Intel Core i5 or AMD Ryzen 5.
- RAM: At least 8GB of RAM is recommended, but 16GB or more is ideal for handling larger projects.
- Storage: An SSD (solid-state drive) is preferred for faster load times, with at least 500GB of storage to accommodate audio files and software.
2. Digital Audio Workstation (DAW)
A DAW is software that allows you to record, edit, and mix audio files. Popular options include:
- Ableton Live
- FL Studio
- Logic Pro X (for Mac users)
- Pro Tools
Choose one that fits your workflow and style of music production.
3. Audio Interface
An audio interface connects your computer to microphones and instruments. It converts analog signals into digital data for recording. Look for features like:
- Multiple inputs if you plan on recording several instruments simultaneously.
- High-quality preamps for better sound quality.
4. Microphones
Depending on what you plan to record, you may need different types of microphones:
- Dynamic Microphones: Great for live performances and loud sounds like drums.
- Condenser Microphones: Ideal for vocals and acoustic instruments due to their sensitivity.
Having at least one good-quality microphone is essential.
5. Studio Monitors and Headphones
To accurately hear what you’re mixing, invest in studio monitors and closed-back headphones:
- Studio Monitors: These provide a flat frequency response, allowing you to hear your mixes accurately.
- Headphones: Good quality closed-back headphones are essential for monitoring while recording.
6. Cables and Accessories
You’ll need various cables to connect everything together:
- XLR Cables: For connecting microphones to the audio interface.
- TRS or TS Cables: For connecting instruments or monitors.
Don’t forget accessories like mic stands and pop filters to improve recording quality!
Setting Up Your Studio
With all your equipment gathered, it’s time to set up your studio! Follow these steps for an efficient setup:
Step 1: Arrange Your Equipment
Start by placing your computer in a comfortable position where you can easily access it while working on music. Position your audio interface close by so that all cables can reach comfortably.
Step 2: Position Your Monitors
Place your studio monitors at ear level and form an equilateral triangle with your listening position. This setup helps produce the best sound quality while mixing.
Step 3: Connect Everything
Use XLR cables to connect microphones to the audio interface. Connect the audio interface to your computer via USB or Thunderbolt cable. Finally, connect the monitors using TRS cables from the audio interface outputs.
Step 4: Install Your DAW
Install your chosen DAW on your computer following its specific instructions. Most DAWs will guide you through setting up audio preferences during the first launch.
Step 5: Test Your Setup
Once everything is connected, do a quick test recording to ensure all equipment is functioning correctly. Check levels on the audio interface and adjust as necessary.
Acoustic Treatment
To enhance sound quality in your home studio, consider adding some acoustic treatment:
- Foam Panels: These help reduce echoes and improve sound clarity.
- Bass Traps: Place these in corners where bass frequencies tend to build up.
Acoustic treatment doesn’t have to be expensive; DIY options are available if you’re on a budget!
If you need to delve a bit more information, here’s a youtube video:
Final Thoughts
Setting up a music studio at home can be both fun and rewarding! With just a few essential pieces of equipment and some thoughtful planning, you’ll be ready to start creating music that reflects your unique style. “Remember that this setup can evolve over time as you gain experience. And once you’re ready to share your music with the world, optimizing your Spotify profile to attract more listeners can help you reach a bigger audience.”