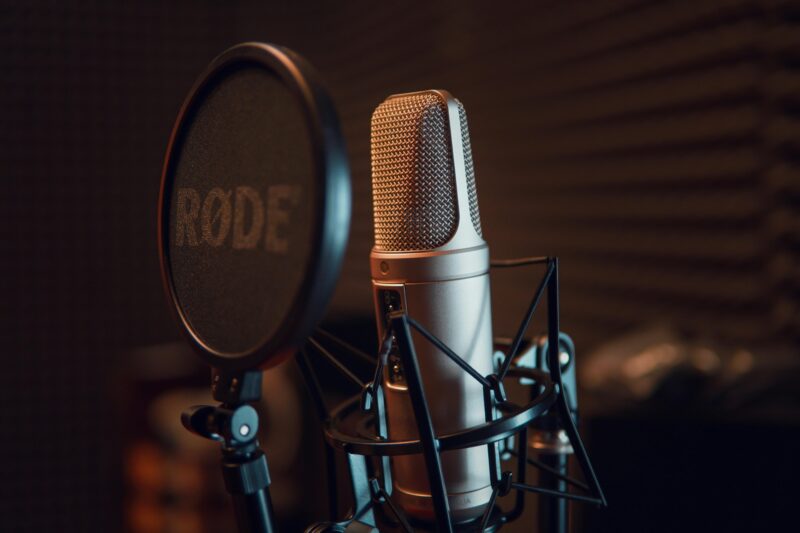
What Is the 3 to 1 Rule When Recording?

If you are new to recording or even just getting better at it, you might have heard about the “3 to 1 rule.” It is a simple guideline that helps you avoid a common problem in audio recording called phase cancellation. Let’s break down what the 3 to 1 rule is and why you should care about it.

The 3 to 1 rule means that the distance between your recording microphones should be at least three times the distance between each mic and the sound source. This helps keep the sound clear and avoids weird echoing or weakness in your recordings.


Why Does the 3 to 1 Rule Matter?

When you record sound with more than one microphone, each mic picks up the sound waves at slightly different times. If the mics are too close to each other, these sound waves can interfere with each other. This is called phase cancellation, and it makes your recording sound hollow, thin, or unclear.

Using the 3 to 1 rule reduces phase issues by pushing the microphones far enough apart. That way, the sound arrives at each mic in ways that don’t cancel each other out. Your recordings stay bright, natural, and enjoyable.


How to Apply the 3 to 1 Rule Practically

Let’s say you are recording a singer with one mic placed very close, about 1 foot away. If you want to add a second mic, make sure it is at least 3 feet away from the first mic. This rule keeps your setup balanced and prevents bad sound effects.

If you record a drum set with multiple mics, apply the same logic: measure the distance from each mic to its source and then space the other mics accordingly. The 3 to 1 rule keeps your recording clean even with many microphones.


Tips for Using the 3 to 1 Rule

  • Measure carefully: Use a tape or ruler to check distances between mics and sources.
  • When recording groups, focus on the main sound sources first.
  • Remember the 3 to 1 ratio applies to all pairs of microphones.
  • If you hear unwanted sound, try adjusting mic distances.
  • Use the 3 to 1 rule along with proper microphone placement techniques to optimize sound quality.

By following the 3 to 1 rule, you avoid the frustration of having to fix recordings later. It saves you time and makes your sounds professional from the start.


Small Step That Makes A Big Difference

Now you know that the 3 to 1 rule is a simple but powerful way to space microphones. It keeps your recordings clear and prevents phase problems that hurt sound quality. You just measure the distance between your mic and the source, then make sure the other mics are three times farther apart. This easy rule improves your audio without complicated gear or setups.

Next time you record, remember the 3 to 1 rule to get crisp, natural, and full sound. It’s a small step that makes a big difference in your recordings and helps you sound your best.

What Computer for Home Studio?

If you’re setting up a home studio, picking the right computer is a big deal. Your computer is the heart of your setup, running your digital audio workstation (DAW), plugins, virtual instruments, and all your recordings. Choosing the wrong one can slow you down, cause crashes, or limit your creative workflow. So, what computer should you get for a home studio? Let’s break it down in a simple way that helps you make the best choice.

Why Your Computer Matters in a Home Studio

When making music or editing audio, your computer has to handle lots of data fast. It runs software that records multiple tracks, processes effects, and plays virtual instruments without lag. You need a computer that’s powerful enough to do this smoothly. Otherwise, you’ll waste time waiting, dealing with glitches, or fighting with frozen programs. A good studio computer also grows with you; it stays reliable even when your projects get bigger or more complex.

Key Things to Look for in a Home Studio Computer

Here are the most important features to consider when choosing your studio computer:

  • Processor (CPU): Think of the CPU as your computer’s brain. You want a fast, multi-core processor (like an Intel i5/i7, AMD Ryzen 5/7, or Apple M1/M2 chip) because audio software demands a lot of computing power.
  • RAM (Memory): More RAM lets your computer juggle big projects with many tracks and plugins open. Aim for at least 16GB of RAM for comfortable performance.
  • Storage: Fast storage matters! A solid state drive (SSD) is a must—it loads your programs and audio files quickly. Go with at least 512GB to 1TB so you have room for all your projects.
  • Audio Interface Compatibility: Your computer must work well with your audio interface. Check that the ports (USB, Thunderbolt) and drivers are supported.
  • Operating System (OS): Most DAWs work on Windows and macOS. Choose the OS that fits your preferred software and workflow.

Best Computer Types for a Home Studio

You basically have three computer options: laptops, desktops, and all-in-ones. Each has its perks.

Desktop Computers

Desktops often offer the best power-to-price ratio. They are easier to upgrade with more RAM or storage later on. If you want rock-solid performance and plan to stay in one spot, desktops are great. Plus, you get more ports for your gear, which can keep your setup neat.

Laptops

Laptops shine if you need mobility. You can take your studio anywhere, from gigs to different rooms at home. Modern laptops pack plenty of power. Just be sure to choose one with strong specs (fast CPU, enough RAM, and SSD storage) to avoid hiccups during sessions.

All-in-Ones

All-in-one computers combine screen and hardware in one device. They save space and look tidy. They can work for lighter studio setups but might not match the power and upgrade options of desktops or high-end laptops.

Top Computer Models for Home Studios

Here are some highly recommended computers for home studios that strike a good balance of power, price, and reliability:

  • Apple MacBook Pro (M1 or M2 chip): Excellent long battery life, powerful performance, and macOS support for popular DAWs like Logic Pro X and Ableton Live.
  • Dell XPS 15 (Windows): A solid Windows laptop with a fast processor and good RAM options, great for running large sessions in Pro Tools or FL Studio.
  • Custom-built Windows Desktop: If you’re comfortable building or buying a custom PC, you can tailor everything to your needs, from a Ryzen 7 CPU to 32GB RAM and roomy SSDs.
  • iMac 24-inch (Apple M1 chip): Combines a beautiful 4.5K display with a powerful chip, perfect for smaller studios wanting elegance and punch.

Tips to Optimize Your Home Studio Computer

Once you pick your computer, keep it running smooth by:

  • Regularly updating your OS and DAW software.
  • Closing unnecessary programs when working in your DAW.
  • Using an external hard drive for sample libraries and backups.
  • Investing in quality audio drivers for your interface.
  • Monitoring CPU and RAM usage to avoid overload.

In short, the computer you choose for your home studio should have a fast processor, at least 16GB RAM, a solid state drive, and the right OS for your DAW. Whether you pick a powerful desktop, a versatile laptop, or an all-in-one depends on your space and mobility needs. With the right machine, you’ll enjoy smooth sessions and focus more on making music. Happy recording!

How to Set Up a Recording Studio at Home

Setting up a home recording studio is an exciting project that lets you capture your creativity, experiment with sound, and produce professional-quality music or podcasts right from your own space. You don’t need to break the bank or have a huge room to get started. With the right approach, you can create a studio that fits your needs, your budget, and your style.

1. Choose the Right Room for Your Studio

The first step is picking the perfect spot in your home. You want a room that’s quiet, away from noisy streets, and not too close to busy household areas like the kitchen or living room. Bedrooms, basements, or spare rooms often work well. Look for a space with minimal echo and little outside noise, because these factors can make a big difference in your recordings.

If you have options, go for a room with carpeted floors and soft furnishings, as they help absorb sound and reduce unwanted reflections. Avoid rooms with lots of windows or hard surfaces, since these can bounce sound around and make mixing more difficult. You don’t need a huge space—a small, cozy room can be perfect for recording vocals, instruments, or podcasts.

2. Plan Your Studio Layout

Once you’ve chosen your room, think about how you’ll arrange your gear. Place your desk or recording table against a short wall, not in the center of the room, to help with sound balance. Leave space behind your chair for sound to travel and avoid placing your setup directly against a wall or in a corner.

Keep your main equipment—computer, audio interface, and monitors—within arm’s reach. If you’re recording vocals or instruments, make sure there’s enough space to move comfortably and set up a microphone stand. Try to keep cables tidy and out of the way to avoid tripping hazards and messy setups.

3. Essential Equipment You Need

You don’t need to buy every piece of fancy gear right away. Here’s a list of the essentials to get your home studio up and running:

  • Computer: A reliable computer is the heart of your studio. You can use a desktop or laptop, as long as it has enough processing power and storage for recording and editing audio files.
  • Digital Audio Workstation (DAW): This is the software you’ll use to record, edit, and mix your music or podcasts. Popular DAWs include Ableton Live, FL Studio, Logic Pro, GarageBand, and Pro Tools. Many offer free trials or entry-level versions.
  • Audio Interface: This device connects your microphones and instruments to your computer. It converts analog signals into digital audio and usually offers better sound quality than your computer’s built-in sound card.
  • Microphone: Start with a good-quality condenser microphone for vocals and acoustic instruments. If you’re recording podcasts or voiceovers, a dynamic microphone can be a great choice.
  • Headphones: Closed-back headphones are ideal for recording because they prevent sound from leaking into the microphone. They also help you hear details when mixing.
  • Studio Monitors: These speakers are designed for accurate sound reproduction. While headphones are great, monitors let you hear your mix as it really sounds in the room.
  • Mic Stand and Pop Filter: A sturdy mic stand keeps your microphone steady, and a pop filter helps reduce plosive sounds (like “p” and “b”).
  • Cables: You’ll need XLR cables for microphones and instrument cables for guitars or keyboards. Get cables long enough for your setup but avoid excessive slack.

4. Sound Treatment: Make Your Room Sound Great

You don’t need to turn your room into a professional studio, but a few simple changes can make a big difference. Hang thick curtains or blankets over windows and bare walls to absorb sound. Place a rug on hard floors to reduce echo. You can buy affordable foam panels or bass traps online, or even make your own with dense foam or insulation covered in fabric.

Place foam panels at the “first reflection points”—the spots on the walls and ceiling where sound bounces directly from your speakers to your ears. This reduces unwanted echoes and makes your recordings sound clearer. Don’t overdo it; too much foam can make your room sound “dead.” Aim for a balanced, natural sound.

5. Setting Up Your Gear

Now it’s time to connect everything. Here’s a simple step-by-step guide:

  1. Set up your desk or table and place your computer and audio interface on it.
  2. Connect your audio interface to your computer via USB, Thunderbolt, or FireWire, depending on the model.
  3. Install your DAW software and any necessary drivers for your audio interface.
  4. Plug your microphone into the audio interface using an XLR cable. Attach the pop filter to the mic stand and position it a couple of inches from the microphone.
  5. Connect your headphones and studio monitors to the audio interface. Make sure you know how to switch between them for recording and mixing.
  6. Arrange your monitors at ear level, forming an equilateral triangle with your head for the best stereo image.
  7. Test everything by recording a short sample and playing it back. Adjust levels as needed.

6. Recording Your First Track

You’re ready to start recording! Open your DAW and create a new project. Set the input channel to match your microphone or instrument. Adjust the gain on your audio interface so your recording levels are strong but not clipping (going into the red).

If you’re recording vocals, stand about six inches from the microphone and use the pop filter to reduce plosives. For instruments, experiment with mic placement to find the best sound. Record a few takes and listen back to choose the best performance.

Don’t worry if things aren’t perfect right away—practice makes perfect, and you’ll get better with each session.

7. Mixing and Editing Your Recordings

After recording, it’s time to mix and edit. Use your DAW to cut out mistakes, adjust timing, and add effects like reverb or compression. Listen to your mix on both headphones and monitors to catch any issues.

Keep your mixes simple at first. Focus on balancing the levels of each track and making sure everything sounds clear. You can always add more effects and polish as you gain experience.

8. Tips for a Productive Home Studio

  • Keep your studio tidy: A clean space helps you focus and keeps your gear in good condition.
  • Back up your recordings: Save your work to an external drive or cloud storage to avoid losing your projects.
  • Take breaks: Long sessions can tire your ears. Step away every hour to stay fresh.
  • Experiment: Try new recording techniques, instruments, or effects to keep things fun and creative.
  • Learn from others: Watch tutorials, read articles, and join online forums to pick up tips and tricks.

9. Budget-Friendly Studio Upgrades

As you get more comfortable, you might want to upgrade your gear. Here are some ideas that won’t break the bank:

  • Add a MIDI keyboard for making beats or playing virtual instruments.
  • Buy a second microphone for recording instruments or backup vocals.
  • Invest in better monitors for more accurate mixing.
  • Get a reflection filter for your microphone to improve vocal recordings in untreated rooms.
  • Upgrade your DAW to unlock more features and plugins.

10. Common Mistakes to Avoid

  • Skipping sound treatment: Even basic soundproofing improves your recordings.
  • Overbuying gear: Start simple and upgrade as you learn what you really need.
  • Ignoring cable management: Tidy cables prevent accidents and make your studio look professional.
  • Recording at high volumes: Loud recordings can distort. Keep levels moderate and monitor with care.
  • Not reading manuals: Take time to learn your gear and software for the best results.

11. Frequently Asked Questions

Do I need expensive equipment to start?
No, you can start with affordable gear and upgrade as you go.

Can I use my bedroom as a studio?
Absolutely! Just treat the room for sound and keep it organized.

What’s the best DAW for beginners?
GarageBand (Mac) and Audacity (Windows/Mac) are user-friendly and free.

How do I avoid background noise?
Record at quiet times, use sound treatment, and keep windows closed.

Is it hard to learn mixing?
It takes practice, but online tutorials and experimenting will help you improve quickly.

12. Final Thoughts

Setting up a home recording studio is a rewarding journey that lets you bring your musical or creative ideas to life. You don’t need a huge budget or a fancy room—just a passion for sound and a willingness to learn. Start small, focus on the essentials, and enjoy the process. Your home studio will grow with you as your skills and creativity develop.

Now, go ahead—set up your studio, hit record, and let your creativity flow!
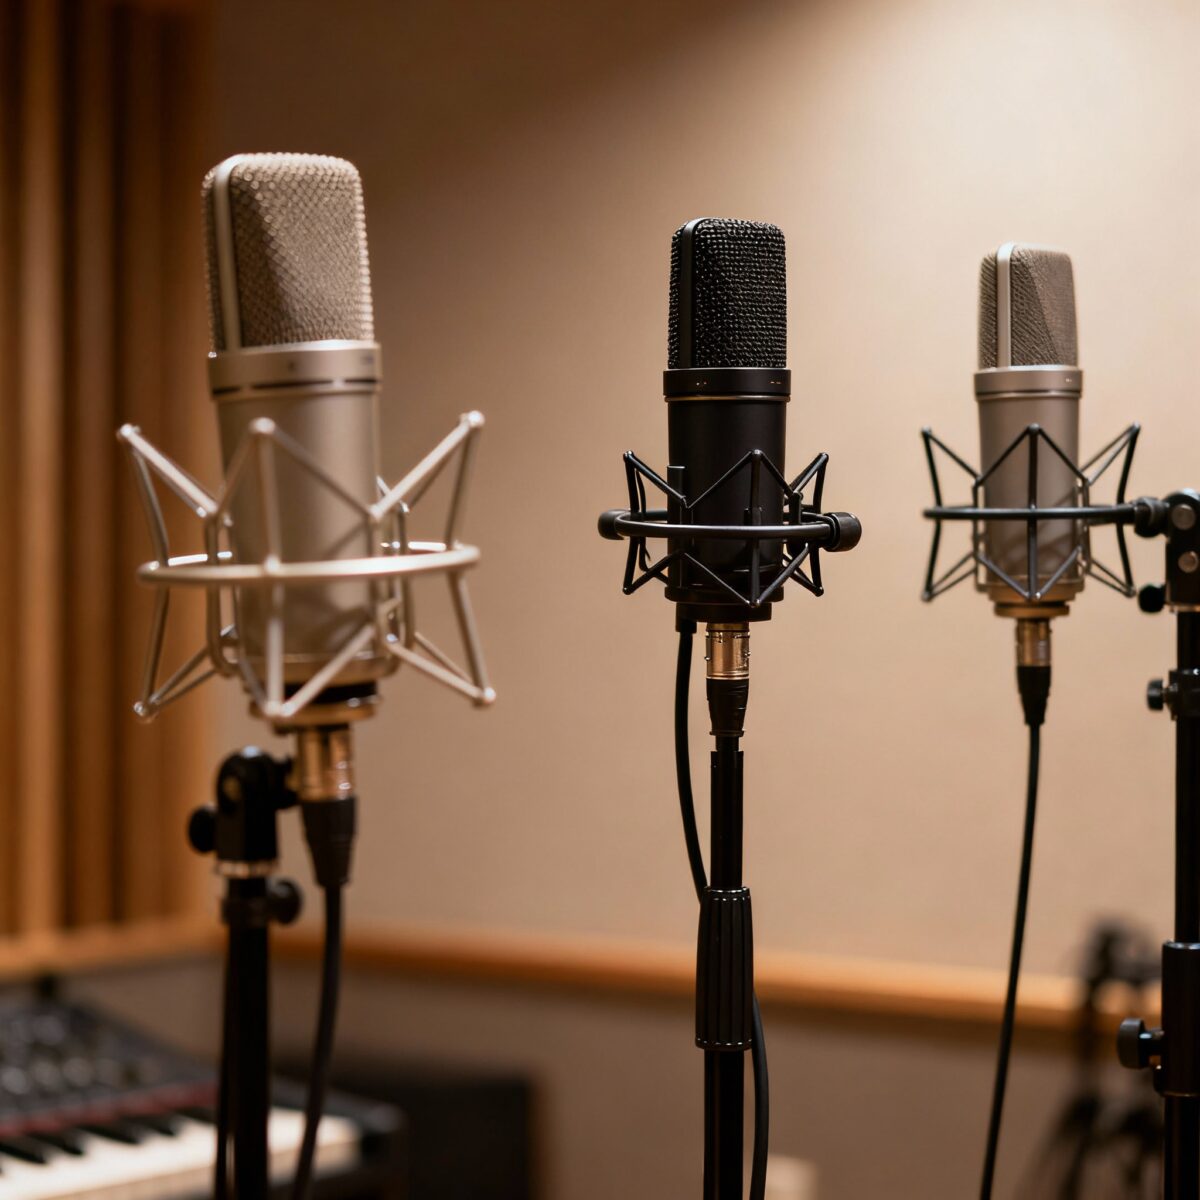
How Much Does a Good Music Studio Cost?

Are you dreaming of recording your first song, producing a full album, or launching a podcast? One of the first questions you’ll face is: How much does a good music studio cost? Whether you want to build your own, rent a professional space, or book time for a single project, understanding the costs involved is key to planning your creative journey. This guide will break down the real numbers, the factors that influence them, and help you decide what’s right for your needs and budget.


What Influences the Cost of a Music Studio?

Before you dive into the numbers, you should know that music studio prices aren’t one-size-fits-all. The cost depends on several factors:

  • Location: Studios in big cities like Los Angeles or New York usually charge more due to higher overhead costs. Studios in smaller towns often offer more affordable rates without sacrificing quality.
  • Equipment: High-end studios with the latest technology and vintage gear will cost more. The better the gear, the higher the price tag.
  • Expertise: Experienced sound engineers and producers can charge premium rates for their skills. You’re not just paying for a space-you’re investing in expertise.
  • Studio Type: Are you looking for a home setup, a professional commercial studio, or something in between? Each comes with its own price range.
  • Size and Space: The bigger and more acoustically treated the space, the higher the cost. Converting a spare room at home is much cheaper than building a commercial facility from scratch.
  • Acoustic Treatment and Soundproofing: Good sound is all about the room. Proper soundproofing and acoustic panels can add thousands to your budget, but they’re essential for professional results.

Now, let’s break down the costs for different types of music studios.


Home Music Studio: Affordable and Flexible

If you want to create music at home, you’re in luck-technology has made home studios more accessible than ever. But how much will you really spend?


Home Studio Cost Breakdown

Basic Home Studio: $300 – $5,000

  • Includes a computer, microphone, audio interface, headphones, and basic speakers.
  • Entry-level microphones start around $80, but high-quality ones can reach $800 or more.
  • Your choice of computer matters-a high-end Apple iMac will cost more than a basic PC.
  • Simple soundproofing and acoustic panels can be DIY or purchased for $1,000 or less.

Mid-Range Home Studio: $5,000 – $25,000

  • Upgrades include better microphones, advanced audio interfaces, premium studio monitors, and more comprehensive acoustic treatment.
  • Add-ons like pop filters, mic stands, and software can increase your investment.

High-End Home Studio: $25,000 – $30,000+

  • Professional-grade gear, top-tier soundproofing, and a dedicated room or building

What’s Included in a Home Studio?

  • Computer or laptop (DAW software)
  • Audio interface
  • Microphones (one or more)
  • Studio monitors (speakers)
  • Headphones
  • Cables, stands, and accessories
  • Acoustic panels and soundproofing

Is a Home Studio Right for You?

If you’re just starting out, a basic home studio is often all you need. You can always upgrade as your skills and needs grow. Many successful artists started in their bedrooms-what matters most is your creativity and dedication.


Professional Music Studio: The Gold Standard

For those who want the best sound, access to top engineers, or a space to record a band or orchestra, a professional studio is the way to go. But be prepared: the costs are much higher.


Building a Professional Studio

  • Small Professional Studio: $30,000 – $100,000
    • Bare-bones setup, limited equipment, but professional-grade sound.
  • Mid-Size Studio: $100,000 – $400,000
    • More space, better gear, advanced mixing consoles, and high-end soundproofing.
  • Large, World-Class Studio: $500,000 – $1,000,000+
    • Custom-built spaces, legendary gear, and everything a top artist could want.

Cost Breakdown

ItemEstimated Cost Range
Studio Space (build/renovate)$12,000 – $150,000+
Mixing Console$18,000 – $85,000+
Audio Processing Equipment$35,000+
Studio Monitors$2,500 – $10,000+ (pair)
Microphones$1,300 – $3,000+ (each)
Recording BoothsUp to $3,400+
Acoustic Treatment$1,000 – $20,000+
Furniture & Decor$500 – $2,000+

Note: These are ballpark figures. Costs can vary widely depending on your choices and location


Renting or Booking Time in a Professional Studio

If building isn’t for you, you can rent a studio by the hour, day, or week.

Hourly Rates: $25 – $300+ per hour

  • Basic studios: $30 – $50/hour
  • Professional studios: $100 – $300/hour or more
  • World-class studios: $500/hour and up

Daily or Weekly Packages

Many studios offer discounted block rates, which are ideal for longer projects.

Additional Fees

Some studios charge extra for technical assistance, instrument rentals, or mixing and mastering services.

Example of Cost to Record a Song

  • Simple Demo: $100 – $500
  • Professional Single: $1,000 – $5,000
  • Full Album: $10,000 – $50,000+ (depending on studio time, production, and mixing needs).

Key Questions to Ask Before You Book or Build

You want to get the most value for your money. Here’s what you should consider:

  • What’s my budget? Be honest about what you can afford. There’s no shame in starting small.
  • What are my goals? Are you making demos, releasing music commercially, or just having fun?
  • How much time do I need? Booking by the hour is great for quick projects, but block rates can save you money for longer sessions.
  • What equipment do I need? Don’t overspend on gear you won’t use. Focus on essentials first.
  • Do I need an engineer or producer? Their expertise can make a big difference in your final product.
  • What’s included in the price? Always ask about extras like mixing, mastering, or equipment rental.

Tips to Save Money on Your Studio

  • Start small and upgrade later. Many artists build their studios piece by piece as their needs grow.
  • Buy used equipment. You can find great deals on second-hand gear.
  • DIY soundproofing. With some creativity, you can make your own acoustic panels and save hundreds.
  • Prioritize essentials. Get a good microphone and audio interface first, then add extras as needed.
  • Book off-peak hours. Some studios offer discounts for late-night or weekday sessions.

Quick Reference: Studio Cost Comparison

Studio TypeStartup/Build CostHourly Rental CostWho’s It For?
Basic Home Studio$300 – $5,000N/ABeginners, hobbyists
Mid-Range Home$5,000 – $25,000N/ASemi-pros, serious creators
High-End Home$25,000 – $30,000+N/APros, commercial projects
Small Pro Studio$30,000 – $100,000$50 – $150Bands, indie artists
Mid/Large Pro Studio$100,000 – $1,000,000+$150 – $500+Major label, film, orchestras

What Does a “Good” Music Studio Cost?

A “good” music studio means different things to different people. For some, it’s a cozy home setup under $1,000. For others, it’s a fully-equipped commercial space costing hundreds of thousands. The right choice depends on your goals, your budget, and the sound you want to achieve.

  • Home studios can be built for as little as $300 if you’re resourceful, but a solid setup with quality gear will run $2,000 to $10,000.
  • Professional studios start around $30,000 to build and can easily exceed $1 million for world-class facilities.
  • Renting studio time is a flexible option, with rates from $30 to $300 per hour, depending on the studio’s reputation, location, and equipment.

No matter your budget, remember: the most important investment is your creativity and passion. Start with what you have, learn as you go, and upgrade when you’re ready. Your music deserves to be heard-so get started and make some noise!

How to Soundproof a Home Studio: A Complete Guide

Creating a home studio is an exciting project, whether you’re a musician, podcaster, or content creator. However, soundproofing is essential to ensure your recordings are clean and free from external noise. This guide will walk you through the key steps to soundproof your home studio effectively.

1. Choose the Right Space

The first step in soundproofing is selecting the best room for your studio. Ideally, pick a space with:

  • Minimal windows and doors.
  • Solid walls (avoid rooms with thin or hollow walls).
  • A location far from noisy areas like kitchens or busy streets.

A basement or an interior room often works best because they naturally reduce noise transmission.

2. Soundproof the Door and Windows

Doors and windows are common weak points for sound leakage. Here’s how you can address them:

Doors

  • Upgrade to a solid-core door if possible. These are denser and block more sound than hollow-core doors.
  • Install door sweeps at the bottom of the door to seal gaps where noise can enter.
  • Use soundproof blankets or acoustic panels on the door for additional insulation.

Windows

  • Add heavy curtains or soundproof window inserts to reduce outside noise.
  • Consider installing double-glazed windows for better sound isolation.
  • Seal any gaps around the window frames with acoustic caulk to prevent sound leakage.

3. Treat the Walls and Ceiling

Soundproofing your walls and ceiling is crucial since these surfaces allow sound to pass through easily.

Good: Basic Wall Treatment

  • Use mass-loaded vinyl (MLV) behind drywall to create a dense barrier that blocks sound transmission.
  • Seal all gaps and cracks with acoustic caulk to prevent noise from sneaking through small openings.

Better: Add Isolation Clips

  • Install sound isolation clips like RSIC-1® clips on your wall studs. These clips separate drywall from the building structure, reducing vibrations and airborne noise.
  • Add a layer of 5/8-inch drywall over the clips for improved results.

Best: Double Drywall with Green Glue

  • Apply Green Glue between two layers of drywall to dampen sound vibrations further. This method can boost your wall’s Sound Transmission Class (STC) rating significantly, making it ideal for professional-grade studios.

For ceilings, follow similar steps:

  • Use isolation clips and channels to decouple the ceiling from the floor above.
  • Avoid recessed lighting (e.g., canned lights), as they create gaps for sound to escape.

4. Focus on the Floor

Floors are often overlooked in home studio projects but can impact overall soundproofing:

  • Install thick carpets or rugs with dense padding to absorb impact noise.
  • For more advanced solutions, use floating floors with acoustic underlayment to isolate vibrations.

If your studio is on an upper floor, floor treatment becomes even more important to prevent noise from traveling below.

5. Acoustic Treatment for Better Sound Quality

While soundproofing keeps unwanted noise out, acoustic treatment enhances the quality of sound within your studio.

Absorptive Panels

  • Place acoustic foam or fiberglass panels on walls and ceilings to reduce echoes and reflections.
  • Position panels strategically behind speakers and on sidewalls where first reflections occur.

Bass Traps

  • Install bass traps in room corners to absorb low-frequency sounds that tend to build up in these areas.
  • Bass traps improve clarity in recordings by reducing muddiness caused by excessive bass frequencies.

Diffusers

  • Use diffusers on back walls or ceilings to scatter sound waves evenly across the room.
  • This creates a more natural-sounding environment, especially in larger studios.

6. Seal Gaps and Cracks

Even small gaps can let significant amounts of noise in or out. To seal them:

  • Use acoustic caulk around outlets, vents, and any cracks in walls or ceilings.
  • Cover air vents with acoustic foam if they’re not essential for ventilation.

Pay attention to details—these small fixes can make a big difference!

7. Build an Isolation Booth (Optional)

If you frequently record vocals or instruments, consider building an isolation booth within your studio:

  • Use dense materials like MDF (medium-density fiberboard) for walls.
  • Line the interior with acoustic foam or panels for maximum absorption.

Isolation booths are particularly useful if external noise levels are high or if you need precise control over recordings.

8. Consider Professional Solutions

If DIY methods aren’t enough, professional-grade solutions may be necessary:

  • Install pre-made soundproof doors with high STC ratings for maximum isolation.
  • Work with an acoustics expert to design custom solutions tailored to your space.

9. Test and Adjust

Once you’ve implemented these steps, test your studio by recording audio at different times of day:

  • Listen for any remaining noise issues and identify their sources.
  • Adjust treatments as needed—sometimes moving a panel or sealing an overlooked gap can solve lingering problems.

Soundproofing a home studio requires effort but is well worth it for high-quality recordings. By addressing doors, windows, walls, ceilings, floors, and acoustics strategically, you can create a professional-grade recording environment right in your home.

Whether you’re working on music, podcasts, or videos, these tips will help you achieve clean audio free from distractions. Happy recording!

What equipment is needed for a home music studio?

Setting up a home music studio can be an exciting journey, whether you’re a budding musician or an experienced producer. The right equipment for a home music studio can make all the difference in the quality of your recordings and the ease of your workflow. In this guide, we’ll explore all the essential gear you need to create a functional and inspiring space for music creation.

Why You Need a Home Music Studio

Creating your own music studio at home allows you to express your creativity without the constraints of time and budget that come with renting studio space. You can record whenever inspiration strikes, experiment with sounds, and develop your skills at your own pace. Plus, the satisfaction of producing music in your own space is truly rewarding!

Essential Equipment for Your Home Music Studio

When it comes to setting up your home studio, there are several key pieces of equipment you’ll need. Let’s break them down into manageable categories so you can understand what each piece does and why it’s important.

1. Computer

Your computer is the heart of your home music studio. It acts as the central hub where all your recordings are processed and edited. Here’s what to consider:

  • Specifications: Aim for at least 8GB of RAM and a fast processor. If you can, go for 16GB or more, especially if you plan on using demanding software.
  • Storage: A minimum of 1TB of storage is recommended to accommodate all your audio files and software.

Whether you choose a Mac or PC is up to personal preference, but ensure it meets the requirements of your chosen Digital Audio Workstation (DAW) software.

2. Digital Audio Workstation (DAW)

A DAW is software that allows you to record, edit, and produce audio files. Some popular options include:

  • Ableton Live: Great for electronic music production.
  • Logic Pro X: A favorite among Mac users.
  • FL Studio: Known for its user-friendly interface.

Choose one that fits your style and workflow preferences. Many DAWs offer free trials, so take advantage of those to find the best fit for you.

3. Audio Interface

An audio interface is crucial for converting analog signals (like those from microphones) into digital data that your computer can process. Here’s what to look for:

  • Inputs/Outputs: Make sure it has enough inputs for your needs—typically at least two for simultaneous recording.
  • Quality: Look for interfaces with high-quality preamps to ensure clear sound capture.

Popular choices include Focusrite Scarlett series or PreSonus AudioBox.

4. Microphones

Microphones are essential for capturing vocals and instruments. Here are some types to consider:

  • Dynamic Microphones: Great for live performances and untreated rooms; they handle high sound pressure levels well.
  • Condenser Microphones: Ideal for studio recordings as they capture a wider frequency range and detail.

For versatility, consider getting both types. A good starter mic is the Audio-Technica AT2020, which offers excellent quality at an affordable price.

5. MIDI Controller

A MIDI controller allows you to input notes into your DAW using keys or pads. This is especially useful if you’re creating electronic music or working with virtual instruments. Look for controllers that are easy to use and integrate seamlessly with your DAW.

6. Studio Monitors

While headphones are great for tracking, studio monitors provide a more accurate representation of how your mix will sound on various playback systems. Here’s what to keep in mind:

  • Size: Choose monitors that fit well in your space; smaller monitors work better in compact studios.
  • Quality: Look for flat frequency response to avoid coloration of sound.

Brands like KRK Rokit or Yamaha HS series are popular choices among home studio owners.

7. Headphones

Investing in a good pair of studio headphones is essential for monitoring during recording sessions and mixing. Look for closed-back headphones that provide isolation from outside noise while delivering accurate sound reproduction.

8. Cables and Stands

You’ll need various cables (like XLR cables) to connect microphones and instruments to your audio interface. Don’t forget microphone stands; these will help position your mics correctly during recording sessions. Additionally, consider getting a pop filter if you plan on recording vocals; it helps reduce plosive sounds caused by consonants like “p” and “b”.

9. Acoustic Treatment

To achieve professional-sounding recordings, consider treating your room acoustically. Simple solutions include:

  • Acoustic Panels: These absorb sound reflections and reduce echo.
  • Bass Traps: Help manage low-frequency sounds.

You don’t need a perfectly treated room, but some basic treatment will significantly improve your recordings.

Expanding Your Home Studio

Once you’ve set up the basics, you might want to expand your home music studio with additional equipment:

  • External Effects Processors: For adding reverb or compression during recording.
  • Additional Microphones: For capturing different instruments or vocalists.
  • Instruments: If you’re a musician, adding guitars, keyboards, or other instruments can enhance your creative possibilities.

Setting up a home music studio is an exciting venture that opens up endless creative possibilities. By investing in essential equipment like a computer, DAW, audio interface, microphones, MIDI controller, monitors, headphones, cables, stands, and acoustic treatment, you’ll create an environment where you can produce high-quality music from the comfort of your own home. Remember that starting simple is perfectly fine; you can always expand as you grow in skill and confidence! So gather this equipment for your home music studio today and let the music flow!