What Is the 3:1 Rule in Audio Recording?

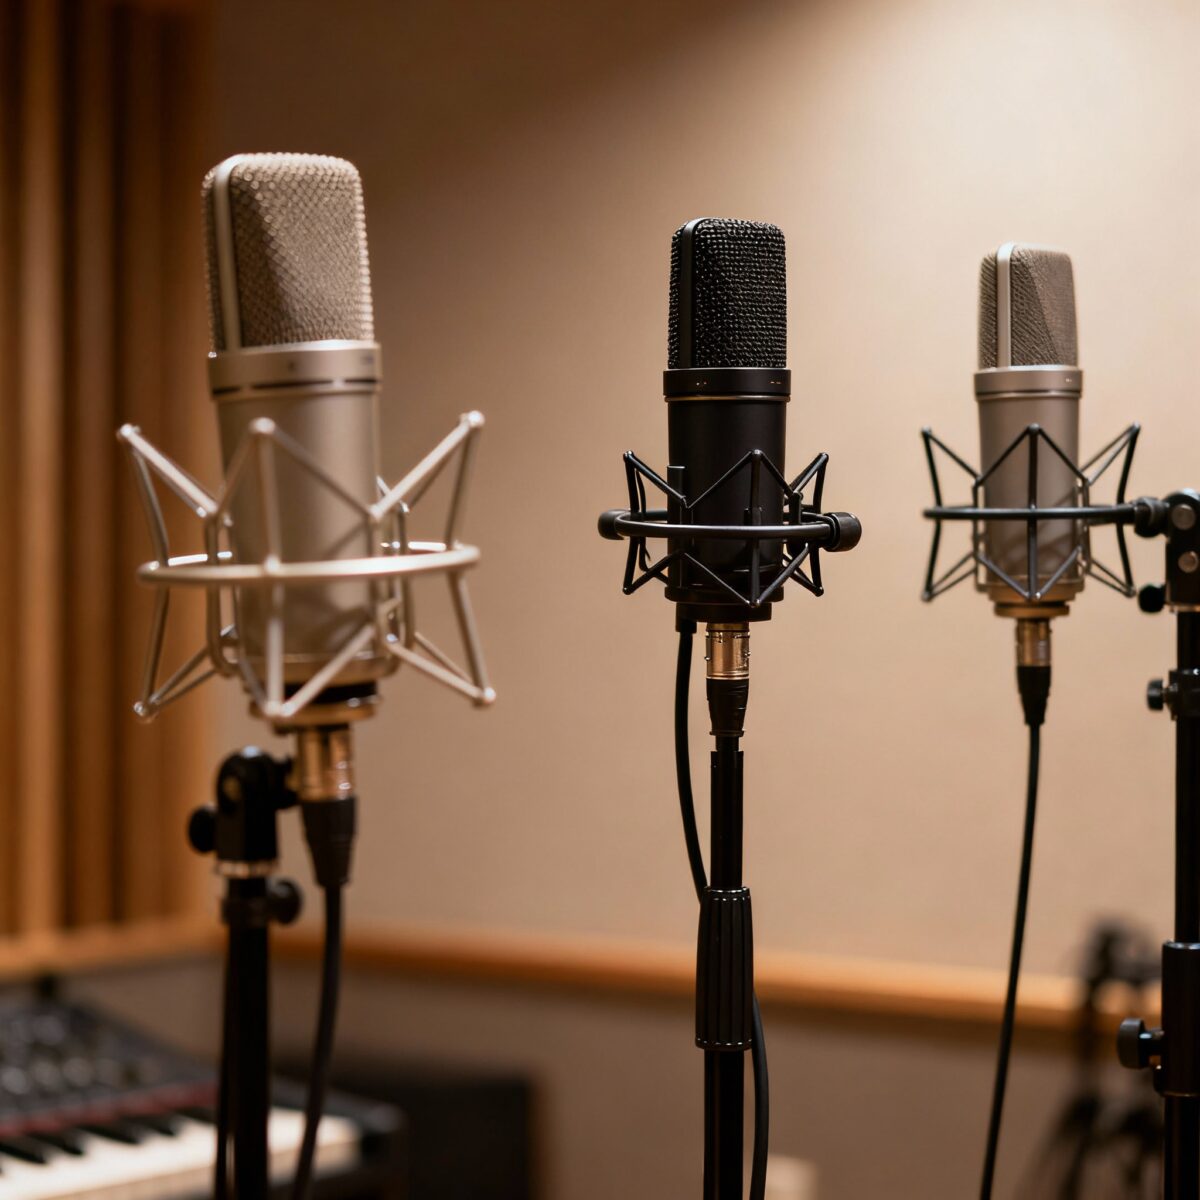
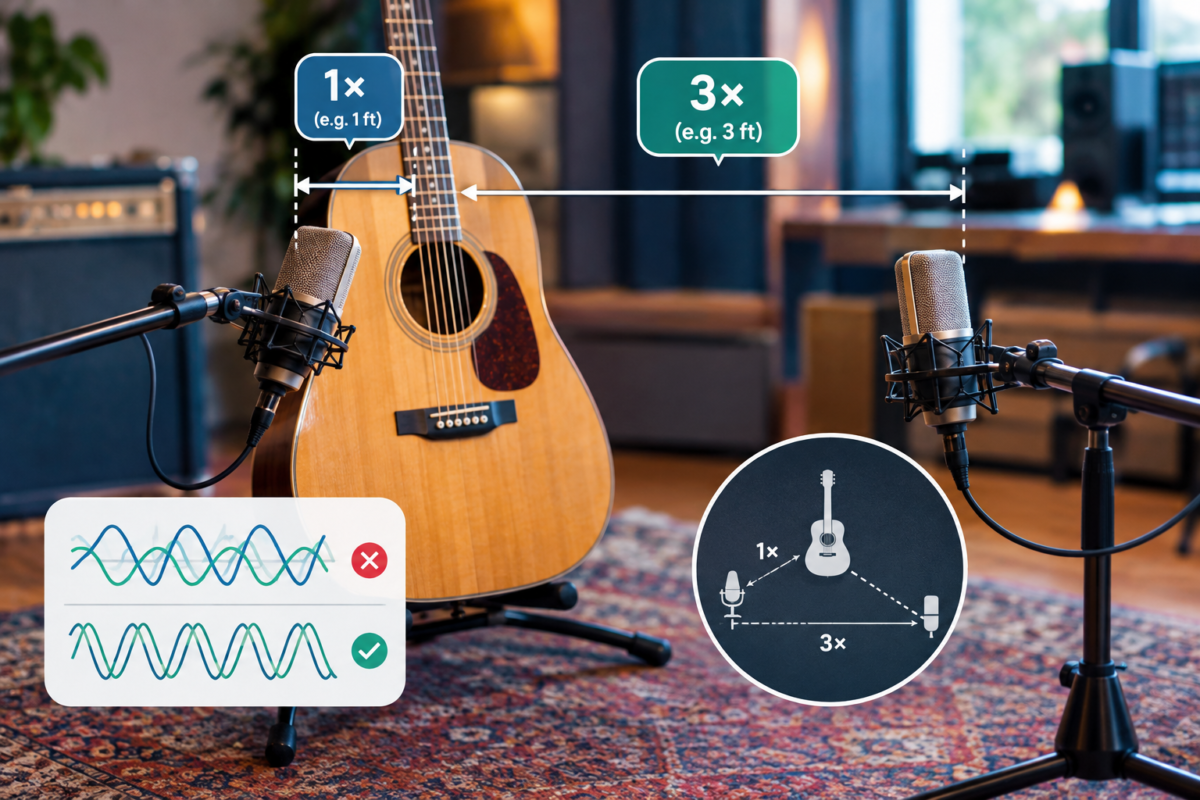
The 3:1 rule in audio recording is a simple microphone-placement guideline used to reduce phase problems when recording with more than one microphone. In basic terms, the distance between two microphones should be at least three times the distance between the first microphone and its sound source.

For example, if you place a microphone 1 foot away from a guitar amp, the second microphone should be at least 3 feet away from the first microphone. This helps prevent a thin, hollow, or “phasey” sound caused by the same audio arriving at each microphone at slightly different times.

The rule is especially useful when recording instruments with multiple mics, such as acoustic guitars, drum kits, choirs, piano, and live sound setups. It is not a strict law of audio engineering, but it is a dependable starting point for cleaner recordings.


Why the 3:1 Rule Matters

When sound travels through the air, it moves in waves. If two microphones pick up the same sound from different distances, the sound may reach one microphone slightly earlier than the other.

That small time difference can cause phase cancellation. In simple language, the waves may line up in a way that weakens certain frequencies. The result can be a recording that sounds hollow, distant, weak, or unnatural. This effect is often called comb filtering because of the comb-like pattern it creates in the frequency response.

The 3:1 rule helps because it creates enough distance between microphones. When one microphone is much closer to the sound source, it captures that source at a stronger level. The farther microphone picks up less of that same sound, so any phase interaction becomes less noticeable.

Think of it like two people trying to have a conversation in a noisy room. If they stand close together, their voices are clear. If one person is far away, their voice becomes much quieter and has less influence on the conversation. The same idea applies to microphones and unwanted sound bleed.


How to Use the 3:1 Rule

Using the 3:1 rule is easy once you understand the basic measurement.

  1. Measure or estimate the distance from the first microphone to its sound source.
  2. Multiply that distance by three.
  3. Place the second microphone at least that far away from the first microphone.

For instance:

  • If Mic A is 6 inches from an acoustic guitar, Mic B should be at least 18 inches away from Mic A.
  • If Mic A is 1 foot from a singer, Mic B should be at least 3 feet away from Mic A.
  • If Mic A is 2 feet from a drum, Mic B should be at least 6 feet away from Mic A.

The key measurement is the distance from the first microphone to the source, not simply the distance between the two microphones. The second microphone should be at least three times that first distance away from the first mic.

This rule can also apply when using several microphones. If your first microphone is 1 foot from the source, the second microphone should be at least 3 feet away. If you add a third microphone, it should be placed even farther away, often at least 9 feet from the original source, depending on the setup.


Example: Recording an Acoustic Guitar

Imagine you want to record an acoustic guitar with two microphones: one near the sound hole and another near the fretboard.

If the first microphone is placed 8 inches from the guitar, the second microphone should be at least 24 inches away from the first microphone. That gives the sound enough separation to reduce phase cancellation.

Without enough spacing, the two microphones may capture the guitar’s sound at slightly different times. When you listen to both tracks together, some frequencies may disappear or sound uneven. The recording may lack body, warmth, or clarity.

By following the 3:1 rule, you give each microphone a clearer job. One microphone can focus on the body and low-end warmth of the guitar, while the other can capture more string detail and finger movement.


When to Use the 3:1 Rule

The 3:1 rule is most helpful when you are using multiple microphones to record the same sound source or nearby sound sources.

Common situations include:

  • Recording an acoustic guitar with two microphones
  • Miking a drum kit with several close microphones
  • Recording a piano with multiple microphones
  • Recording a choir, ensemble, or group of singers
  • Capturing a live band with several vocal and instrument microphones
  • Recording a podcast or panel discussion with multiple people using separate microphones
  • Setting up microphones for live sound reinforcement

In live sound, the rule is especially important because multiple open microphones can pick up the same voices or instruments. If the microphones are too close together, the sound system may produce phase issues, feedback risks, and a less clear mix.


When the Rule May Not Apply

The 3:1 rule is a helpful guideline, but it is not something you must follow in every recording situation.

Sometimes, engineers intentionally place microphones close together. A common example is a stereo pair, such as an XY pair or spaced pair. These setups are designed to capture a wider stereo image, and they may not follow the traditional 3:1 spacing.

Other times, the room, instrument, microphone type, and desired sound matter more than the rule itself. A close-miked electric guitar cabinet, for example, may sound great with one microphone, while adding a second microphone requires careful placement and phase checking.

The 3:1 rule is best treated as a starting point, not a rigid formula. If the recording sounds full, clear, and natural, you do not need to force the exact measurement. If it sounds thin or hollow, adjust the microphone distance and listen again.


Phase Cancellation Explained Simply

Phase cancellation happens when two versions of the same sound combine in a way that reduces part of the audio.

Sound waves have peaks and valleys. When two identical waves line up, they reinforce each other and become louder. But when one wave’s peak meets another wave’s valley, they can partially cancel each other out.

In a recording, this can make certain frequencies weaker. You may notice:

  • A hollow or “underwater” sound
  • Reduced bass or low-end warmth
  • A thin vocal or instrument tone
  • A strange change in sound when two tracks are played together
  • A recording that sounds better when one microphone is muted

This does not mean phase cancellation is always bad. In stereo recording, small phase differences can create width and space. But when you want a clear, focused, mono-compatible sound, controlling phase becomes important.


How to Check for Phase Problems

The easiest way to check for phase issues is to listen carefully.

Record both microphones, then play the tracks together. Next, mute one microphone and listen again. If the combined sound suddenly becomes thinner, weaker, or hollow, you may have a phase problem.

You can also try these quick checks:

  • Flip the polarity or phase button on one microphone channel and compare the sound.
  • Move one microphone slightly closer or farther from the source.
  • Change the angle of one microphone.
  • Use fewer microphones if the extra mic is not adding much value.
  • Record each microphone on a separate track so you can adjust them later.

Trust your ears more than any rule. The 3:1 rule can prevent many issues, but testing the actual recording is always the best final check.


Tips for Better Microphone Placement

Here are a few practical tips to make the 3:1 rule work well in your recordings:

  • Start with one microphone and get the best sound possible before adding another.
  • Keep the primary microphone close to the sound source.
  • Place additional microphones far enough away to reduce unwanted bleed.
  • Use directional microphones, such as cardioid mics, to help reject sound from unwanted directions.
  • Avoid placing two microphones at equal distances from the same source unless you intentionally want a specific stereo effect.
  • Listen in mono as well as stereo to check for phase cancellation.
  • Make small adjustments instead of moving microphones dramatically.
  • Label your tracks clearly so you know which microphone captured which part of the sound.

Good microphone placement is often about balance. You want enough microphones to capture the detail you need, but not so many that they create confusion, bleed, and phase issues.


Common Mistakes to Avoid

One common mistake is placing two microphones very close together while both are picking up the same instrument. This can create strong phase interaction, especially if the microphones are at different angles or distances from the source.

Another mistake is assuming that expensive microphones will automatically fix phase problems. Even high-quality microphones can create issues if they are placed poorly.

Also, avoid relying only on visual placement. Two microphones may look properly spaced, but the sound can still interact in unwanted ways. Always record a short test and listen back before starting the full session.

Finally, do not treat the 3:1 rule as a replacement for good monitoring. Your ears, the room, the instrument, and the style of music all affect the final result.


The 3:1 rule

The 3:1 rule in audio recording is a practical way to reduce phase cancellation and create cleaner multi-microphone recordings. It says that the distance between two microphones should be at least three times the distance from the first microphone to its sound source.

Use it as a helpful starting point when recording guitars, drums, vocals, ensembles, podcasts, or live sound. Then listen carefully, test your setup, and make adjustments based on what sounds best.

When used well, the 3:1 rule helps your recordings sound fuller, clearer, and more professional—without turning microphone placement into a complicated science experiment.
Step-by-Step Guide On How to Properly Record a Song

Recording a song at home used to feel like a dream reserved for pros with big budgets. Today, you can capture radio-ready tracks from your bedroom—if you know the right steps. This guide walks you through exactly how to properly record a song, from setting up your space to nailing your takes, editing, and prepping for mixdown. No fluff, no jargon—just clear, helpful advice that gets results.


What You’ll Need Before You Hit Record

You don’t need a million-dollar studio, but you do need a few essentials to get clean, usable audio.

  • Microphone: A condenser mic is great for quiet, controlled rooms. A dynamic mic works better in untreated or noisy spaces.
  • Audio interface: This connects your mic to your computer and provides clean preamps.
  • DAW (Digital Audio Workstation): Software like Ableton, Logic, FL Studio, or Reaper where you record and edit.
  • Headphones: Closed-back headphones help you hear the track without bleed into the mic.
  • Pop filter: Reduces harsh “p” and “b” sounds (plosives).
  • Mic stand and XLR cable: For stable placement and connection.
  • Quiet, soft room: Choose a small room with curtains, rugs, or blankets to reduce echo.

Optional but helpful: acoustic panels or bass traps for corners, a reflection filter behind the mic, and a thick rug if you have hard floors.


Step 1: Set Up Your Recording Space

Your room is your first instrument. Even the best mic will sound thin or boxy in a bad space.

  • Pick the quietest room: Close windows, turn off fans/AC, and record when your home is calm.
  • Reduce reflections: Hang heavy blankets on walls behind and beside the mic. Add a rug if you have tile or hardwood.
  • Avoid the center: Don’t record in the middle of an empty room. Stand closer to a wall or corner with soft materials.
  • Point the mic away from hard surfaces: Aim the mic toward soft furnishings, not bare walls or windows.

If you’re on a tight budget, two mattresses in a corner with the mic in front and one behind you can work surprisingly well.


Step 2: Connect and Configure Your Gear

Get your signal path right so you record clean audio without noise or clipping.

  • Mic → XLR cable → audio interface → computer: This is the standard chain.
  • Set your DAW track: Create a new audio track, select the correct input (your interface’s mic channel), and arm the track for recording.
  • Sample rate and bit depth: Record at 24-bit resolution for more dynamic range. 44.1 kHz or 48 kHz sample rate is standard.
  • Monitor with headphones: Use closed-back headphones to avoid bleed into the mic.

Step 3: Mic Placement and Pop Filter Setup

Good placement saves hours of fixing problems later.

  • Distance: Stand 6–8 inches (15–20 cm) from the mic capsule. For louder singers, go 8–10 inches.
  • Height: Keep the mic at mouth level, slightly tilted upward.
  • Angle: Point the mic slightly off-axis (15–30 degrees toward your nose or chin) to reduce sibilance and plosives.
  • Pop filter: Mount it 2–4 inches in front of the mic, and keep your mouth 4–8 inches behind the filter.
  • Mark your spot: Put tape on the floor for your feet and on the mic stand for height so you stay consistent across takes.

Step 4: Set Your Gain (Levels) the Right Way

Gain staging is the difference between a clean recording and a distorted mess.

  • Ask the singer to perform the loudest part (usually the chorus) at full intensity.
  • Watch your DAW input meter: Aim for peaks between -18 and -12 dBFS. Some guides say -12 to -6 dBFS is fine, but never hit 0 dBFS (clipping).
  • Adjust the interface gain knob: If peaks go above -12 dBFS, lower the gain. If they’re below -24 dBFS, raise it.
  • Leave headroom: Recording “hot” (too loud) leaves no room for plugins later. Louder is not better.

Step 5: Warm Up and Test

Don’t jump straight into the final take.

  • Vocal warm-up: 5–10 minutes of scales, humming, or lip trills.
  • Hydrate: Drink room-temperature water (not ice cold).
  • Test recording: Record 30 seconds to check levels, tone, and room noise.
  • Record silence: Capture 3–5 seconds of room tone before your first take. This helps with noise reduction later.

Step 6: Record Multiple Takes

One take is rarely the best take.

  • Record at least 3 full takes of each section (verse, chorus, bridge). More is better if you have time.
  • Stay consistent: Keep the same distance, posture, and mic position for every take.
  • Use a click track or instrumental: Make sure the tempo and key match your arrangement.
  • Punch in if needed: If you mess up a line, re-record just that part instead of the whole song.

Step 7: Comping (Choosing the Best Parts)

Comping means combining the best phrases from multiple takes into one master vocal track.

  • Listen to all takes: Mark the best lines, words, or even syllables.
  • Create a new track: Copy the best sections onto one clean vocal track.
  • Smooth transitions: Add tiny crossfades (10–30 ms) between comped sections to avoid clicks.
  • Keep it natural: Don’t over-edit. The goal is a cohesive performance, not a robotic one.

Step 8: Basic Editing and Cleanup

Before mixing, tidy up your audio.

  • Trim silence: Cut long gaps before and after phrases, but leave a little breath for realism.
  • Remove clicks and pops: Use your DAW’s fade tools or a dedicated de-click plugin.
  • Tune only where needed: Apply light pitch correction (like Auto-Tune or Melodyne) only on off notes.
  • De-noise if necessary: Use a noise reduction plugin on the room tone you recorded earlier to create a profile, then apply lightly to the vocal.

Step 9: Pre-Mix Prep (Optional but Smart)

You don’t need to mix yet, but a little prep makes the next stage easier.

  • Organize tracks: Label your vocal, instrumental, and FX tracks clearly.
  • Group similar tracks: Group all background vocals or all drums for easier processing later.
  • Save versions: Keep a “raw” version of your song before adding any effects, so you can always go back.
  • Check phase: If you used multiple mics, make sure they’re not canceling each other out.

Step 10: Export for Mixing or Mastering

When your recording and editing are done, export a clean version for the next stage.

  • Export as WAV: Use 24-bit WAV for the highest quality. Avoid MP3 for mixing.
  • Leave headroom: Make sure your final export peaks around -6 dBFS to give the mixing engineer room to work.
  • Include all tracks: If you’re sending to a pro, export each track (stems) as well as the full mix.

Common Mistakes to Avoid

Even small errors can ruin an otherwise great recording. Watch out for these:

  • Recording in a noisy or echoey room: Kitchens, bathrooms, and empty living rooms sound terrible.
  • Mic too close or too far: Too close = boomy and plosive-heavy. Too far = thin and roomy. Stick to 6–10 inches.
  • Clipping the input: If your meter hits 0 dBFS, the audio is distorted and unusable.
  • Using compression or heavy effects while recording: Record dry (no effects) so you have flexibility later.
  • Only one take: You limit your options for comping and fixing mistakes.
  • Ignoring gain staging: Recording too hot or too quiet makes mixing harder and can introduce noise.

Quick Checklist Before You Record

Run through this list every session to save time and stress:

  • Room is quiet and soft (blankets, rugs, curtains in place)
  • Mic is 6–8 inches from mouth, slightly off-axis
  • Pop filter is 2–4 inches in front of the mic
  • Gain is set so peaks hit -18 to -12 dB
  • Headphones are on, track is armed, and input is selected
  • 3–5 seconds of silence recorded for noise profile
  • At least 3 full takes recorded for each section
  • Best parts comped onto one vocal track
  • Clicks, pops, and obvious pitch issues fixed
  • Exported as 24-bit WAV with headroom

Keep It Simple and Consistent

Recording a song properly isn’t about fancy gear—it’s about good habits. Choose a quiet room, place your mic right, set your gain conservatively, and record multiple takes. Edit lightly, comp thoughtfully, and export cleanly. Do these steps consistently, and your home recordings will sound polished, professional, and ready for the next stage.

Now you’ve got the blueprint. Set up your space, hit record, and let your song shine.

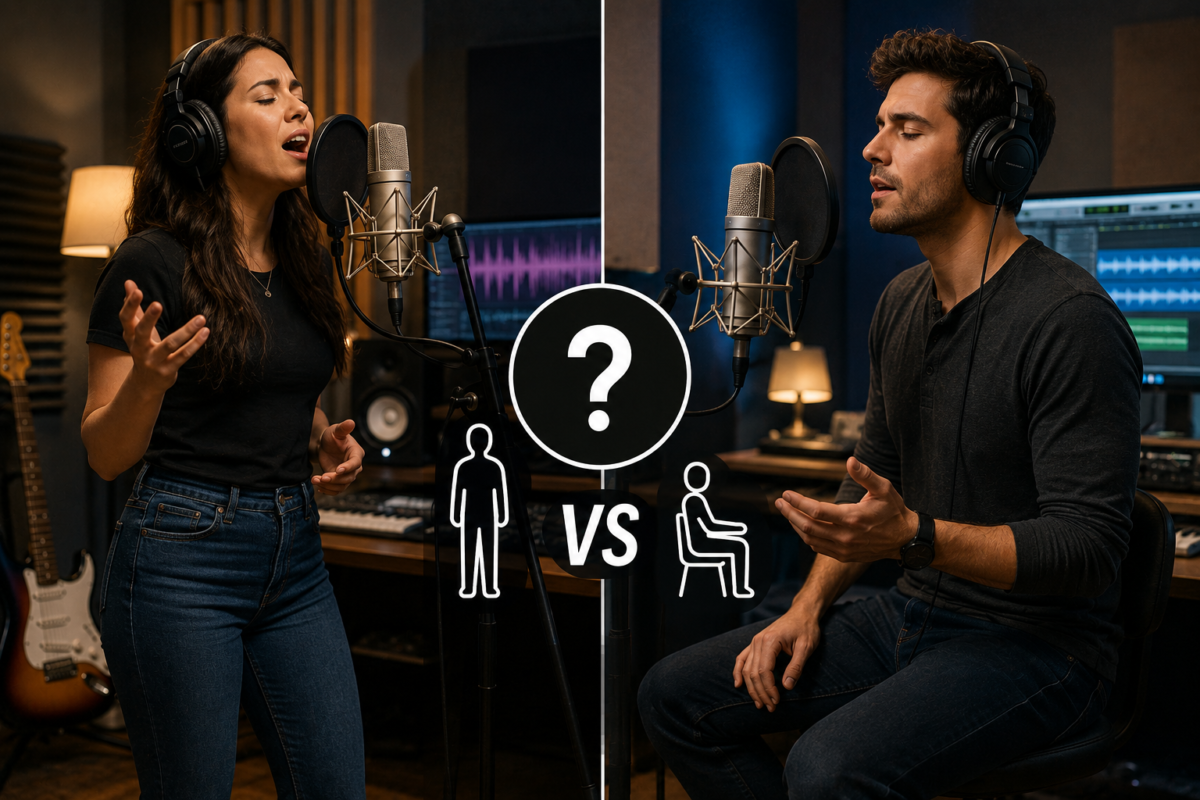
Is It Better to Stand or Sit When Recording Vocals?

When recording vocals, standing is generally the better choice for most singers. It can make it easier to breathe deeply, maintain good posture, project your voice, and deliver a more energetic performance.

However, sitting is not automatically wrong. The best position is the one that allows you to sing comfortably, breathe naturally, stay consistent near the microphone, and give your strongest performance. If sitting helps you relax and produce a better take, it may be the right choice for you.

The decision is not simply about whether standing or sitting is “correct.” It depends on your vocal style, song, physical comfort, recording setup, and ability to maintain proper posture.


Why Many Singers Prefer Standing

Standing gives your body more freedom to move. Your ribs, abdomen, chest, neck, and shoulders can expand naturally as you breathe. This can be especially helpful when singing long phrases, powerful choruses, high notes, or emotionally intense sections.

When you stand correctly, your body is naturally arranged in a way that supports vocal performance. Your feet can stay grounded, your spine can remain tall, and your shoulders can stay relaxed. This creates a stable foundation without making your body feel stiff.

Standing may also help you feel more connected to the song. You can use natural hand gestures, move slightly with the rhythm, and bring more physical energy into your delivery. That extra movement can make a major difference when recording pop, rock, R&B, gospel, musical theater, or other expressive styles.

Good standing posture can also help prevent unnecessary tension. When the head, neck, shoulders, and spine are aligned, you are less likely to push your chin forward, collapse your chest, or tighten your throat while singing.

That said, standing does not automatically improve every vocal recording. If you lock your knees, raise your shoulders, lean too far forward, or sway constantly, standing may create new problems. The goal is not to stand like a statue. The goal is to remain balanced, relaxed, and ready to breathe.


How Standing Can Support Breathing

Breath control is one of the main reasons singers choose to stand while recording. Singing requires controlled airflow, and your posture affects how freely your body can manage that air.

A useful standing position includes:

  • Feet about hip-width apart.
  • Knees relaxed rather than locked.
  • Hips balanced under the ribs.
  • Chest comfortably lifted without being forced upward.
  • Shoulders relaxed.
  • Head balanced over the neck.
  • Jaw and tongue free from unnecessary tension.

Your body should feel tall, but not rigid. Imagine that the top of your head is gently lifting upward while your feet remain connected to the floor.

This position gives your rib cage and abdomen room to respond as you inhale and sing. You should not force your stomach outward or try to take an enormous breath before every line. Instead, allow the breath to enter quietly and let your body manage the airflow gradually.

Standing can be particularly useful for vocal parts that require:

  • Long phrases.
  • Strong volume.
  • Sustained notes.
  • Fast lyrics.
  • Belting.
  • Vocal runs.
  • Dramatic emotional changes.
  • Frequent movement between chest voice and head voice.

A recent study examining sitting and standing during voice-range-profile performance found no significant difference in the measured vocal parameters between the two positions for healthy, untrained participants. This suggests that standing is not a magic solution; posture quality and the individual singer’s response matter more than the position alone.

In other words, standing may provide better physical freedom, but it will not automatically make your voice better. A comfortable singer with good alignment can often perform well in either position.


Is Sitting Bad for Recording Vocals?

No. Sitting is not bad for recording vocals as long as you sit in a way that supports your voice.

The problem is usually not the chair itself. The problem is slouching.

When singers sink into a chair, their chest may collapse, their shoulders may round forward, and their abdomen may become compressed. This can make breathing feel restricted and may encourage tension in the neck or throat. Slouching can also change the distance between your mouth and the microphone, creating unwanted changes in volume and tone.

Sitting can work well when you:

  • Keep both feet flat on the floor.
  • Sit toward the front or middle of the chair rather than sinking into the back.
  • Keep your spine long.
  • Let your shoulders rest naturally.
  • Keep your head level.
  • Avoid crossing your legs.
  • Leave enough space for your abdomen and ribs to move.
  • Keep your body facing the microphone.

A firm chair without bulky armrests is often more practical than a soft couch. A couch may feel comfortable, but it can encourage you to sink into an uneven position. An adjustable stool can also be useful because it allows you to sit tall while keeping your feet supported.

Sitting may be the better option when you are recovering from an injury, recording for a long period, dealing with fatigue, or performing a softer and more intimate vocal. Some singers feel more relaxed when seated, and relaxation can improve pitch, tone, and emotional delivery.

Sitting can also be useful during songwriting sessions, vocal editing, or repeated takes. If you need to operate your recording software between takes, a seated setup may be easier and more efficient.

The key is to make sure your seated position does not reduce your breathing space or cause you to collapse toward the microphone.


Standing Versus Sitting for Different Vocal Styles

The best position may change depending on the type of vocal you are recording.

Pop and Rock Vocals

Standing is often helpful for pop and rock vocals because these styles may require energy, strong projection, and physical expression. Standing can make it easier to use your entire body and deliver a powerful chorus.

If you are recording a softer verse followed by a large chorus, you can still stand for both sections. Instead of changing positions, adjust your energy, breath pressure, facial expression, and distance from the microphone.

Ballads and Intimate Vocals

Sitting may work well for quiet ballads, acoustic songs, and intimate performances. A seated position can help some singers feel calm and focused, especially when the performance depends on subtle emotion rather than physical power.

However, sitting should not mean becoming inactive. Keep your feet grounded, maintain a tall spine, and allow your ribs to expand. A relaxed seated performance can sound warm and close without becoming breathy or weak.

Rap and Spoken Vocals

Rappers and spoken-word performers may use either position depending on their delivery. Standing can help with fast flows, aggressive projection, and high-energy performances. Sitting may be convenient for long sessions or more conversational styles.

The most important factors are rhythmic control, consistent microphone distance, clear articulation, and enough breath to complete each phrase. If sitting causes you to lean toward the microphone during intense lines, standing may be more reliable.

High Notes and Belting

Standing may give you more room to manage high notes and powerful phrases, but it does not guarantee easier singing. High notes should not be forced by pushing the body forward or raising the shoulders.

Whether sitting or standing, keep your neck relaxed and avoid lifting your chin to reach the note. A balanced posture helps you maintain a more consistent vocal tract shape.

Harmonies and Background Vocals

Sitting can be practical when recording many harmony parts. You may spend a long time repeating short sections, checking pitch, and moving between tracks. If sitting helps you remain focused and comfortable, it can be a smart choice.

Just remember that harmonies still need proper breath support and consistent mic technique. A tired, slouched posture can affect tone even when the vocal part seems easy.


Microphone Position Matters More Than You Think

Your posture and microphone technique work together. You can have excellent body alignment, but the recording may still sound inconsistent if you move too close or too far away from the microphone.

Set the microphone at a height that allows you to keep your head level. If it is too low, you may bend your neck or look downward. If it is too high, you may lift your chin or strain to reach it. A properly positioned microphone encourages a natural posture.

Use a pop filter between your mouth and the microphone. A practical starting point is to place your mouth several inches from the pop filter, then adjust the distance based on your microphone, room, voice, and desired sound.

Try to keep a consistent distance during normal singing. If you move forward for quiet lines and slightly backward for louder sections, do it smoothly and repeatably. Sudden movements can create large volume changes, tonal differences, or proximity-effect buildup.

A producer may ask you to move closer for a softer, more intimate sound or step back slightly for a loud section. This can work well, but it should be controlled rather than random.

The microphone should also be positioned so you do not need to twist your body, bend your neck, or lean sideways. Face the microphone naturally and keep your mouth directed toward the capsule.


Why Consistency Is Important

The best vocal position is the one you can repeat from take to take.

Imagine recording a verse while sitting, a pre-chorus while standing, and the chorus while leaning toward the microphone. Even if every section sounds good by itself, the tone and volume may change noticeably when the parts are combined.

Consistency helps your vocals sound more natural during editing and mixing. It also makes it easier for the engineer to compare takes, comp the best phrases, and apply compression or equalization without correcting large performance differences.

Before recording, choose a position and test it with a short section of the song. Listen for:

  • Vocal tone.
  • Breath comfort.
  • Pitch stability.
  • Energy.
  • Mic distance.
  • Jaw and neck tension.
  • Volume consistency.
  • Ease of repeating the performance.

Record the same line while sitting and standing if you are unsure. Do not judge only by how the position feels. Listen back to both recordings and ask which one sounds more controlled, expressive, and natural.

Sometimes a singer feels more powerful while standing, but the recording sounds tense. Another singer may feel relaxed while sitting, and the final vocal may sound better. Your ears should help make the final decision.


Common Problems When Standing

Standing is useful, but poor standing posture can hurt your recording.

Locking Your Knees

Some singers lock their knees because they are trying to stand perfectly still. This can make the body feel rigid and may increase tension. Keep your knees soft and allow your weight to remain balanced.

Leaning Into the Microphone

Leaning forward can compress your body and change the sound as you get closer to the microphone. Stand or sit tall enough that the microphone comes to you rather than forcing your body toward it.

Raising the Shoulders

When singers take a breath, they sometimes lift their shoulders. This often creates visible tension and makes breathing feel less natural. Let the shoulders remain quiet while the ribs and abdomen respond to the breath.

Swaying Too Much

Movement can add emotion, but excessive swaying may change microphone distance and create uneven recordings. Use small, natural movements and return to a reliable center position.

Standing Without Grounding

If your feet shift constantly, your performance may feel unstable. Place your feet comfortably apart and let your weight distribute evenly. You can still move, but begin from a stable base.


Common Problems When Sitting

Sitting can also create posture issues that affect the voice.

Slouching

Slouching is the biggest concern. It can reduce the space available for breathing and make the tone sound less open. Sit tall without pressing your back unnaturally against the chair.

Crossing Your Legs

Crossing your legs may cause your hips and spine to rotate. It can also make it harder to keep your feet grounded. Place both feet on the floor when recording important vocal parts.

Sitting Too Far Back

A deep chair may encourage you to relax into a rounded position. Sit toward the front portion of the seat if that helps you keep your spine long and your chest comfortable.

Turning Toward the Screen

If your computer is positioned to one side, you may twist your neck while singing. Face the microphone first. Arrange your screen, keyboard, or remote controls so you can operate them without changing your vocal position.

Pressing the Abdomen

A tight waistband or cramped sitting position can make breathing uncomfortable. Wear clothing that allows your torso to move freely, especially during demanding songs.


A Simple Test to Choose Your Position

If you are deciding whether to sit or stand, try this quick recording test:

  1. Warm up your voice gently.
  2. Set the microphone and pop filter in a comfortable position.
  3. Record one verse and chorus while standing.
  4. Rest briefly.
  5. Record the same sections while sitting with good posture.
  6. Keep the microphone settings and room conditions the same.
  7. Listen to both takes at a similar volume.
  8. Compare comfort, tone, pitch, breath control, energy, and consistency.

Do not choose the louder take automatically. A louder vocal may simply be closer to the microphone or delivered with more force. Pay attention to which position gives you a balanced sound without unnecessary strain.

Also consider how your performance feels after several takes. A position that sounds good for one take may become tiring during a full session. The best recording posture should support both vocal quality and endurance.


When You Should Switch Positions

You do not have to use the same position for every part of a recording session. Some singers stand for lead vocals and sit for harmonies. Others stand for energetic songs and sit for spoken introductions or soft backing parts.

You may also switch positions when your body becomes tired. A short break, gentle stretch, or change in posture can help you reset your breathing and attention.

If you change from sitting to standing during the same song, make sure your microphone position remains consistent. You may need to adjust the stand or mark the floor so your mouth stays at the same height and distance.

You can also record difficult sections while standing and less demanding sections while sitting. This is perfectly acceptable as long as the tone and microphone technique remain controlled.


So, Is Standing or Sitting Better?

For most singers, standing is the best starting position when recording vocals. It usually provides more freedom for breathing, movement, projection, and emotional delivery.

But standing is not a requirement for a great vocal. Sitting can work just as well when you maintain an upright, relaxed posture and avoid compressing your body. Research has also found no significant vocal-range-profile advantage between sitting and standing in healthy, untrained participants, reinforcing the idea that posture quality matters more than the position by itself.

Choose standing when you need more energy, powerful projection, long phrases, or physical expression. Choose sitting when it helps you stay comfortable, focused, relaxed, or efficient during a long recording session.

The most accurate answer is simple: record in the position that gives you the best performance without tension. Keep your posture balanced, your breathing natural, and your distance from the microphone consistent. If you can do those things, both sitting and standing can produce an excellent vocal recording.

How Close to the Mic When Recording? The Ultimate Guide to Perfect Mic Distance

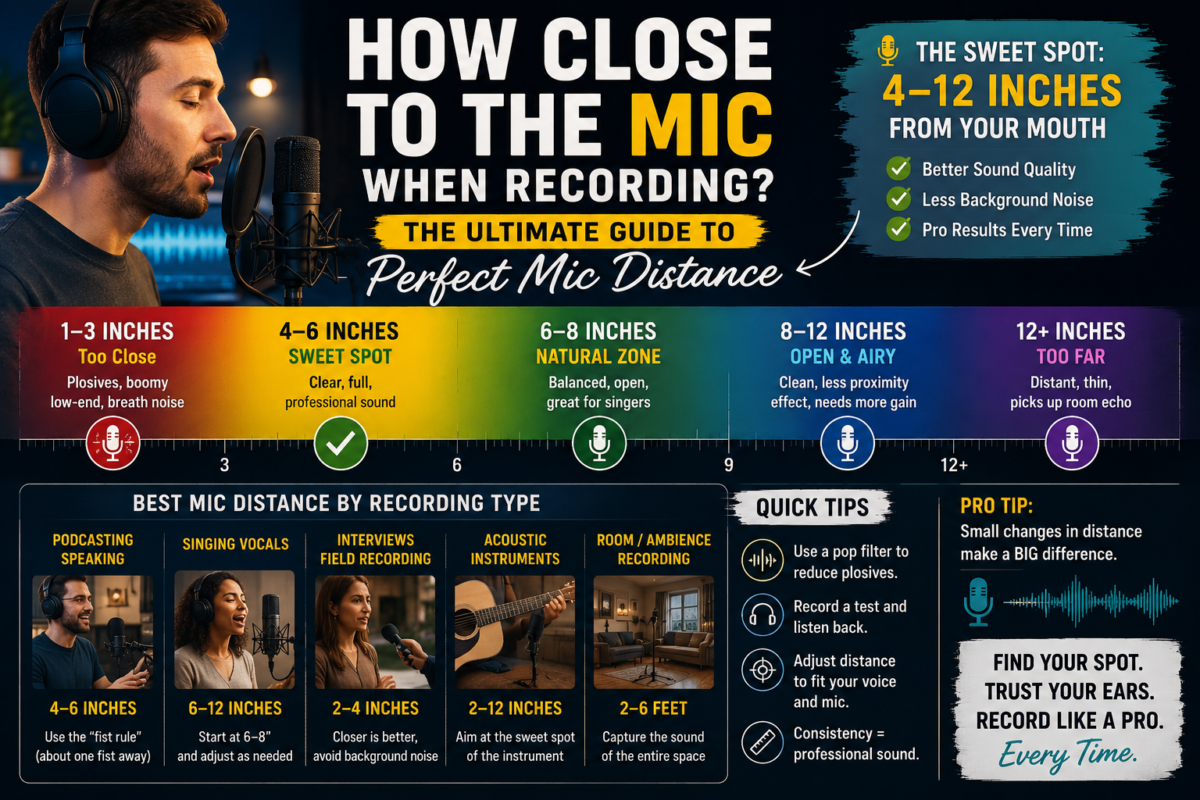
If you’ve ever recorded audio that sounded muddy, boomy, or too quiet, the problem might not be your microphone—it’s probably your distance from it. The secret to crystal-clear recordings is mastering how close to stand or position your mouth to the mic. For most speaking and vocal applications, the ideal microphone distance is between 4 to 12 inches from your mouth. This sweet spot captures your voice with clarity and presence while avoiding common audio issues like plosives (popping sounds from breath), excessive background noise, or a boomy tone.

Whether you’re recording podcasts, vocals for music, voiceovers, interviews, or YouTube videos, mic distance is one of the simplest things you can control to instantly upgrade your sound quality. You don’t need expensive gear or a professional studio—just the right placement technique. In this guide, we’ll break down exactly how close to be to the mic for different recording scenarios, why distance matters so much, and easy tricks to find your perfect spot every time.


Why Mic Distance Makes All the Difference

Your microphone doesn’t just hear your voice—it hears your voice + everything around it. The closer you are to the mic, the more of your voice it captures and the less of the room noise it picks up. This is called the “proximity effect.” When you’re close (around 4–6 inches), your voice sounds fuller, warmer, and more intimate. But if you’re too close (less than 3 inches), you’ll start hearing unwanted breath pops, plosives, and a overly boomy low-end that makes your recording sound unprofessional.

On the flip side, standing too far away (more than 12 inches) makes your voice sound thin, quiet, and distant. The mic also picks up more room echo, HVAC noise, keyboard clicks, and background chatter. Ever notice how professional podcasters sound so crisp and close while home recordings sound like they’re in an empty gym? That’s almost always about mic distance.

Here’s what happens at different distances:

Distance from MicSound QualityCommon Issues
1–3 inchesVery warm, intimate, loudPlosives (popping), boomy low-end, breath noise 
4–6 inchesClear, full, professionalMinimal issues—this is the sweet spot for most speakers 
6–8 inchesNatural, balanced, slightly less intimateGreat for singers who move around 
8–12 inchesOpen, airy, less room noiseVoice sounds slightly quieter, needs better preamp gain 
12+ inchesDistant, thin, lots of room echoPicks up background noise, sounds unprofessional 

The key takeaway? There’s no single “perfect” distance for everyone, but 4–8 inches is the golden range for 90% of recording situations. The rest is about tweaking based on your voice, your mic, and what you’re recording.


The Right Distance for Different Recording Types

Not all recordings need the same mic distance. Singers, podcasters, interviewers, and voiceover artists all have slightly different needs. Let’s break it down by scenario so you know exactly how close to be every time.

Podcasting and Speaking Applications

For podcasts, voiceovers, narration, and talking-head videos, the optimal microphone distance is 4 to 6 inches from your mouth. This distance gives you that “radio voice” sound—clear, confident, and intimate without sounding too close or boomy.

Many podcasters use the “fist rule”: hold your hand up in a fist and position the mic so it’s about one fist-length away from your mouth (roughly 4–6 inches). This is a super easy trick that works for almost anyone.

If you’re doing a podcast with multiple people sharing one mic, bump the distance out to 8–10 inches so everyone can be heard clearly without one person dominating the recording.

Singing Vocals (Pop, Rock, Rap, Country)

For singing vocals, the general rule of thumb is 6 to 12 inches away from the microphone. Why the wider range? Singers move more than speakers—they lean in for emotional parts, pull back for powerful notes, and sway with the rhythm. Starting at 6–8 inches gives you room to move without accidentally getting too close.

Different genres have different preferences:

  • Pop and R&B: 6–8 inches for that smooth, intimate sound
  • Rock and Metal: 8–10 inches to handle loud singing without distortion
  • Rap: 4–6 inches (sometimes even closer) for that tight, aggressive sound, but use a pop filter to avoid plosives
  • Country and Folk: 8–12 inches for a more natural, airy sound

If you’re new to recording vocals, grab a tape measure or ruler and actually measure 6 inches from your mouth to the mic. It sounds silly, but it helps you build the muscle memory for where to stand every time.

Interviews and Field Recording

When recording interviews (especially outdoor or on-the-go), the mic should be held about 3 inches from the person’s mouth for the clearest sound. This is closer than indoor recording because there’s usually more background noise outside.

Key tips for interviews:

  • Never let your interviewee hold the mic—they’ll fidget and create noise
  • Point the mic away from noisy backgrounds (traffic, crowds)
  • Use a boom arm or handheld mic on a stand so it stays in the perfect spot
  • Keep your hand planted on the mic stand and don’t move it during the recording

For video interviews where the mic needs to be hidden (like an on-camera mic), position it as close as possible without being in the frame—usually 6–10 inches works best.

Acoustic Instruments and Room Recording

Recording instruments is a whole different game. For acoustic guitar, start with the mic 6–12 inches away, pointed at the spot where the neck meets the body. For drums, overhead mics are usually 2–4 feet above, while snare mics are 1–2 inches above the rim.

If you’re recording a full band or room ambience, you’ll want to be much farther away—2–6 feet depending on the room size. The goal here is to capture the “space” of the room, not just the instrument.


Easy Tricks to Find Your Perfect Mic Distance Every Time

You don’t need a degree in audio engineering to nail mic distance. Here are four simple tricks that work for anyone:

1. The Fist Rule (Best for Podcasters)

Hold up your hand in a fist. The distance from your thumb to your knuckles is roughly 4–6 inches. Position the mic there. This is the most popular trick among podcasters because it’s fast, repeatable, and works for almost everyone.

2. The Two-Fist Rule (Best for Singers)

Stack two fists together. The distance from your thumb to the last knuckle is about 6–12 inches. This is perfect for singers who need room to move.

3. The Hand-Length Rule

Measure from the tip of your pinky to the tip of your thumb when your hand is open. That’s roughly 6–8 inches—perfect for most vocal recording.

4. The Tape Measure Method (Best for Beginners)

If you’re really new to recording, grab a tape measure or ruler and literally measure 6 inches from your mouth to the mic. Do this 3–5 times until you can feel where 6 inches is without measuring. Your brain will start to remember the spot.

Bonus Tip: Always Use a Pop Filter

If you’re recording within 4–6 inches of the mic (especially for rap or podcasting), use a pop filter between your mouth and the mic. This blocks plosives and breath noise while still giving you that warm, close sound.


Common Mic Distance Mistakes (And How to Fix Them)

Even experienced recordists make these mistakes. Here’s what to avoid:

Mistake 1: Standing Too Close
You’re less than 3 inches from the mic. Your recording sounds boomy, and you hear “popping” on words like “pop,” “potato,” and “baby.”

  • Fix: Move back to 4–6 inches and add a pop filter.

Mistake 2: Standing Too Far
You’re more than 12 inches from the mic. Your voice sounds thin, quiet, and distant. You hear lots of room echo.

  • Fix: Move closer to 6–8 inches. If your voice is still quiet, increase the gain on your recorder, not the distance.

Mistake 3: Moving Around Too Much
You lean in for emotional parts and pull back for loud parts, but your distance changes by 6+ inches. Your recording volume and tone fluctuate wildly.

  • Fix: Find your sweet spot (6 inches is great) and stay there. If you need more dynamics, use your voice, not your body distance.

Mistake 4: Not Angling the Mic
You’re pointing the mic directly at your mouth. This maximizes plosives.

  • Fix: Angle the mic slightly up or down (15–30 degrees) so breath goes past the mic instead of into it.

Mistake 5: Using the Wrong Mic for the Distance
You’re using a microphone that’s not designed for close recording (like some live sound mics) and trying to record 4 inches away.

  • Fix: Most cardioid condenser mics love 5–6 inches+ with a pop filter. Check your mic’s specs before recording.

Final Tips for Recording Like a Pro

Here are a few last tricks to take your recordings from “home studio” to “professional”:

  • Test before you record: Say a few sentences and listen back. If it sounds boomy, move back 1 inch. If it sounds thin, move closer 1 inch. Repeat until it’s perfect.
  • Use a boom arm: A boom arm keeps the mic steady at the exact distance you set. No more accidentally moving it 3 inches closer while you’re singing.
  • Record in a quiet room: Even at the perfect distance, a noisy room will ruin your recording. Turn off fans, close windows, and record when it’s quiet.
  • Don’t fidget: Plant your hand on the mic stand and don’t move it during recording. Every movement changes your distance and ruins consistency.
  • Experiment: Your voice is unique. Someone else’s perfect 6 inches might be 7 inches for you. Try 4, 5, 6, 7, and 8 inches and pick the one that sounds best to YOU.

Your New Go-To Mic Distance

So, how close to the mic when recording? The answer is simple: 4 to 8 inches is your golden zone for most speaking and vocal recordings. Start at 6 inches, test it, and tweak by 1-inch increments until your voice sounds crystal clear, warm, and professional.

Remember:

  • Podcasts and speech: 4–6 inches
  • Singing vocals: 6–12 inches
  • Interviews: 3 inches (outdoor) to 6 inches (indoor)
  • Always use a pop filter if you’re under 6 inches

Mic distance is the easiest free upgrade you can give your audio. No expensive gear, no fancy plugins—just move your mic (or your mouth) a few inches and instantly sound better. Now grab your mic, measure 6 inches, and record something that sounds amazing. You’ve got this!

How Big Should a Home Studio Be?

Hey there, aspiring creator! Ever stared at your cluttered corner desk and wondered, “Is this space big enough for my big dreams?” You’re not alone. Setting up a home studio—whether for music, podcasting, video editing, photography, or art—starts with one burning question: How big should it be? The truth is, there’s no one-size-fits-all answer. It depends on your setup, goals, and what you’re comfy with. But don’t worry—I’m here to break it down step by step, like a friendly guide walking you through your dream space. We’ll cover the sweet spots for different studios, key factors to consider, and tips to make any size work like magic. Let’s dive in and find the perfect fit for you!


Ideal Sizes for Different Types of Home Studios

Picture this: You’re jamming on your guitar, but your mic stand bumps the wall every time you strum. Or you’re editing a YouTube video, and your dual monitors feel squished next to a pile of cables. Size matters, but “big” doesn’t always mean better. Let’s look at recommended footprints for popular home studio types. These are based on real-world ergonomics, equipment needs, and what pros (and everyday creators) swear by.


Music Recording Studios

For musicians, podcasters, or voice-over artists, sound is king. You need room for acoustic treatment, instruments, and movement without echoes ruining your takes.

  • Beginner Setup: 8×10 feet (80 sq ft). Perfect for a desk, computer, audio interface, monitors, mic on a stand, and a chair. Add foam panels on walls for basic soundproofing. It’s cozy—like a snug cockpit for your hits.
  • Intermediate Sweet Spot: 10×12 feet (120 sq ft). Room for a keyboard, guitar amp, and a small sofa for breaks. This size lets sound waves breathe, reducing muddiness in recordings. Think of it as your personal garage band haven without the neighbors complaining.
  • Pro-Level Home Studio: 12×15 feet (180 sq ft) or bigger. Space for a full drum kit, multiple mics, and even a iso-booth corner for vocals. Why? Low frequencies (bass) need space to develop without bouncing off walls like a hyper ping-pong ball.

Real talk: In a 2023 survey by Sound on Sound magazine, 65% of home recordists loved 100-150 sq ft for balancing space and rent-free living.


Video and Streaming Studios

If you’re into YouTube, TikTok, or live streams, lighting, cameras, and green screens demand elbow room.

  • Starter Zone: 9×9 feet (81 sq ft). Fits a webcam, ring light, tripod, and backdrop. Swivel your chair for shots without knocking over your coffee—essential for those “oops” moments!
  • Growing Creator: 10×14 feet (140 sq ft). Add multiple cameras, softboxes, and a teleprompter. This size prevents shadows from creeping in and gives you space to pace during hype intros.
  • Full Production: 12×16 feet (192 sq ft) minimum. Room for a chroma key wall, guest seating, and gear racks. Streamers like MrBeast started small, but pros scale up for multi-angle magic.

Bonus: Vertical space counts! Aim for 8-foot ceilings to hang lights without feeling like a cave.


Photography, Art, or Crafting Studios

Artists and photographers need flat surfaces, drying space, and light—lots of it.

  • Hobbyist Nook: 8×8 feet (64 sq ft). A workbench, easel, and storage shelves. Ideal for painters or product shooters who batch small projects.
  • Serious Creator: 10×12 feet (120 sq ft). Extra for posing subjects, backdrops, and a shooting table. Photographers rave about this size for natural light setups near windows.
  • Expanded Workshop: 12×18 feet (216 sq ft). Big enough for large canvases, sculpture tools, or studio lights. Crafters love it for mess-free zones with easy cleanup.

Pro tip: Measure for your tallest gear. A 7-foot light stand in a 6-foot-10 ceiling? Recipe for a headache.


Multi-Purpose or Hybrid Studios

Many folks blend uses—like music + video. Go for 12×12 feet (144 sq ft) as a versatile starter. It flexes for podcasts one day and photo shoots the next. Modular furniture (foldable desks, rolling racks) makes it a chameleon.

No matter the type, add 2-3 feet around your main setup for “flow space.” It’s like leaving room for a dance party in your creative bubble!


Key Factors That Determine Your Home Studio Size

Size isn’t just about square footage—it’s about smart choices tailored to you. Here’s what to weigh so your studio feels just right, Goldilocks-style.

Your Equipment and Workflow

List your gear first: How many monitors? Guitar pedals? Camera rigs? Each piece claims territory.

  • Minimalist Gear: Laptop + mic? 7×10 feet works.
  • Loaded Setup: Full rackmount audio, 4K cameras? Double it to 15×15 feet.

Workflow matters too. Do you stand to mix tracks or sit to edit? Add 4-5 feet in front for arm swings. Ergonomics tip: Keep your “reach zone” (mouse, keyboard, sliders) within 2 feet to avoid backaches.

Acoustics and Sound Control

Stuff bounces in small rooms! Under 100 sq ft, bass builds up like uninvited guests at a party.

  • Test it: Clap in your space. Echoey? Go bigger or add bass traps.
  • Rule of thumb: Room dimensions in a 1:1.6:2.5 ratio (e.g., 10x16x25 feet) minimize standing waves. Apps like Room EQ Wizard (free!) simulate this.

For non-audio studios, echo is less critical, but soft furnishings (rugs, curtains) tame reverb anywhere.

Lighting and Power Needs

Natural light is gold, but studios crave control.

  • Window Access: Prioritize 10+ sq ft near windows for photographers/videographers.
  • Artificial Setup: 3-point lighting needs 6×8 feet clearance. Power: Calculate watts (e.g., 4 lights at 100W each = 400W circuit). Small spaces overload outlets—plan extension-friendly zones.

Budget and Lifestyle Fit

Bigger isn’t always better if it means sacrificing your bedroom.

  • Rent vs. Own: Spare room? Use it. Apartment dweller? Corner of the living room (100 sq ft max).
  • Family Factor: Kids/pets? Add dividers for a “studio within a room.” Noise? Thicker walls or a 200 sq ft dedicated space.

Budget hack: Start small (under $500 for basics), expand as you grow. Many creators bootstrap in 80 sq ft and thrive!

Future-Proofing Your Space

Dream big! Leave expansion room. Wall-mount shelves now, add a loft later. Measure doors/windows for gear moves—nothing kills momentum like a stuck desk.


Common Size Mistakes and How to Dodge Them

We’ve all been there—buying a fancy mixer that doesn’t fit. Avoid these pitfalls for a studio that sparks joy.

  • Too Small (Under 64 sq ft): Feels like a closet. Fix: Go vertical with wall racks or multi-use furniture.
  • Too Big (Over 300 sq ft): Wasted space echoes and collects dust. Fix: Zone it (recording area, lounge, storage).
  • Ignoring Shape: Long, skinny rooms (5×20 feet) create dead spots. Aim for square-ish.
  • Forgetting Extras: HVAC vents, doors swinging in? Subtract 10-20 sq ft. Measure twice!

Quick fix for any size: Mirrors expand visually, plants soften vibes, and color-coding cables keeps chaos at bay.


Real-World Examples and Success Stories

Let’s get inspired!

  • Tiny Titan: Producer Finneas (Billie Eilish’s brother) crushed hits in a 10×10 ft garage corner. Acoustic panels and savvy placement did the trick.
  • Balanced Bliss: Podcaster Pat Flynn rocks a 12×14 ft office—desk, mics, camera, all in harmony.
  • Spacious Splendor: Photographer Peter McKinnon uses a 15×20 ft loft for epic shoots, but swears his first 8×10 closet built his skills.

User poll fun: On Reddit’s r/homestudio, 70% say 120 sq ft is the “just right” zone for most budgets.


Maximizing Any Size: Pro Tips for Studio Happiness

Stuck with small digs? No sweat—smarten it up!

  1. Furniture Hacks: Murphy beds hide during sessions; rolling carts zip away.
  2. Acoustic Wizards: Bass traps in corners, diffusers on ceilings—under $200 transforms sound.
  3. Lighting Magic: Clamp lights save floor space; LED panels fold flat.
  4. Cable Zen: Under-desk trays banish tangles.
  5. Multi-Functional Musts: Desk doubles as light stand base.

Scale test: Tape your floor plan with painter’s tape. Live in it for a day—adjust!


Your Perfect Size Awaits

So, how big should your home studio be? For most starters, 100-150 square feet hits the jackpot—room to create without overwhelming your home. Musicians lean 120 sq ft, videographers 140 sq ft, artists 100 sq ft. Factor in gear, acoustics, light, and lifestyle, then measure, mock up, and make it yours.

The magic isn’t in the meters—it’s in the making. Start where you stand, tweak as you grow, and watch your creativity explode. Got a wild setup idea? Your first track, video, or canvas is calling. Grab that tape measure and build your dream— you’ve got this!

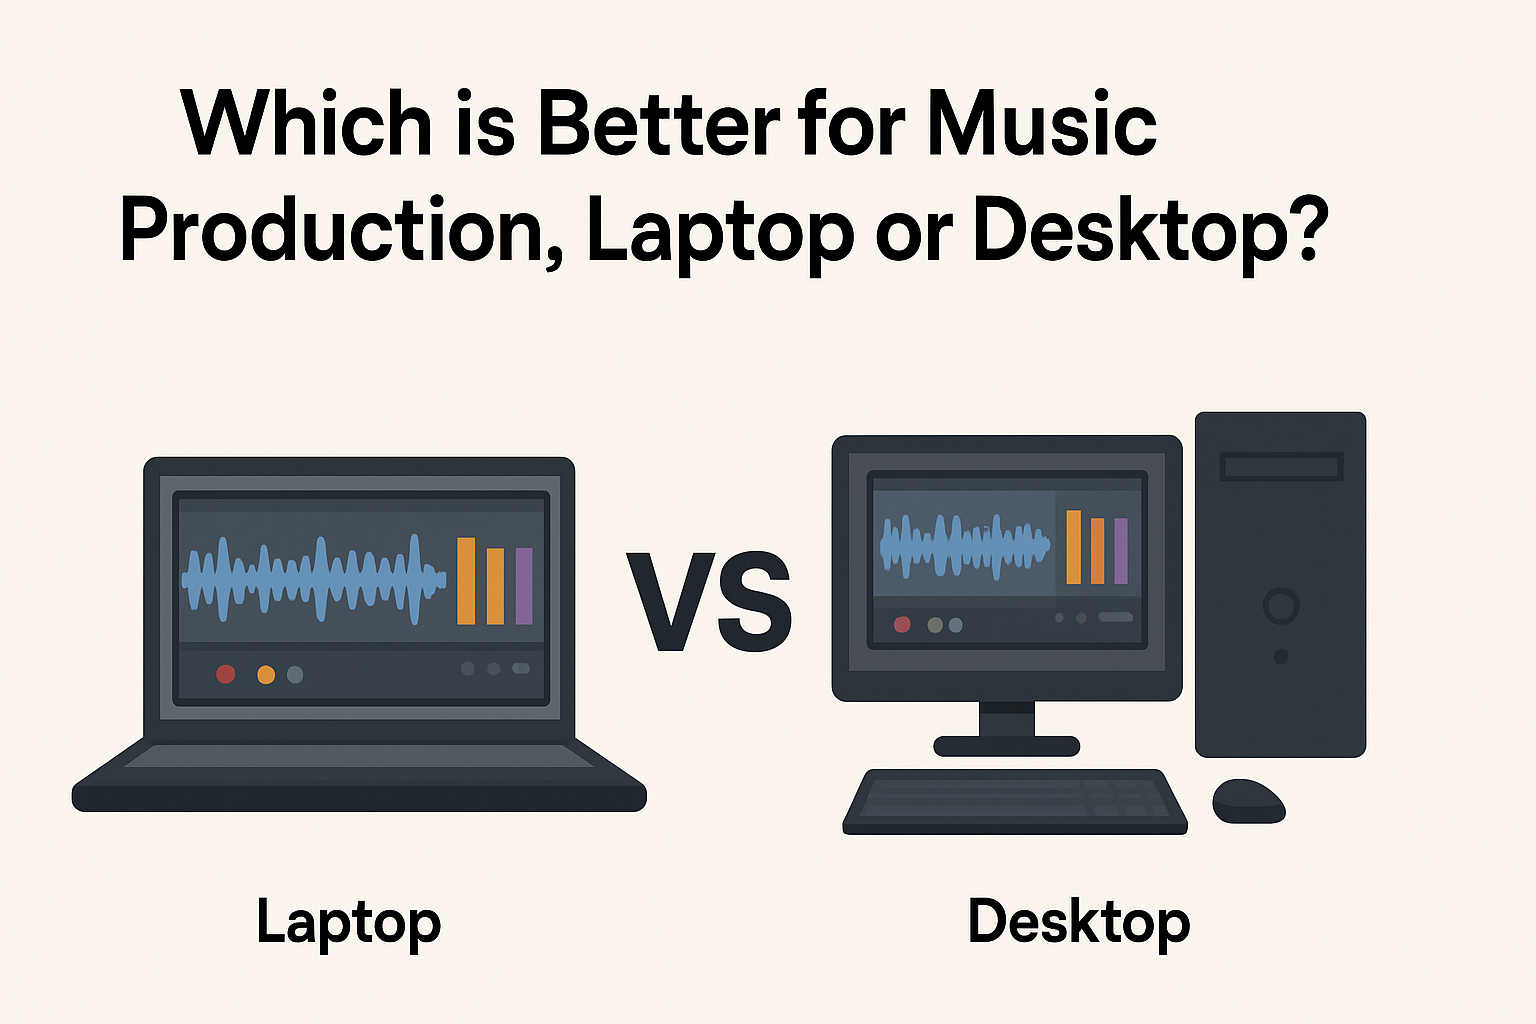
Which is Better for Music Production, Laptop or Desktop?

When deciding between a laptop and desktop for music production, you want to choose the option that fits your workflow, budget, and space. Both have their strengths and weaknesses, so understanding what matters most to you will help you make the right choice. Let’s break down the factors you should consider so you can answer the question: which is better for music production?


Performance and Power: How Much Muscle Do You Really Need?

Music production software, also called digital audio workstations (DAWs), can be demanding. They require good processors, plenty of RAM, and fast storage to handle multiple tracks, plugins, and effects smoothly. Desktop computers generally offer better performance because they can accommodate bigger, faster components.

With a desktop, you’re able to choose powerful processors, high amounts of RAM (16GB or more), and large solid-state drives (SSD) without worrying much about power consumption or heat. This means fewer slowdowns and less waiting time when you’re mixing or rendering your tracks.

Laptops, while improving rapidly, often have to make compromises. They may have slower processors and less RAM than desktops at the same price point. Over long sessions, laptops can heat up, causing performance dips due to thermal throttling. However, modern high-end laptops can still provide plenty of power for music production, especially if you mainly use a moderate number of tracks and effects.

If you heavily multitask with extensive plugins, virtual instruments, and large sample libraries, a desktop might serve you best. But if you produce more straightforward projects or focus on portability, a laptop can handle most workloads just fine.


Portability: Work Anywhere You Want or Stay Set Up at Home

One of the biggest differences between laptops and desktops is portability. If you want to produce music on the go, a laptop is obviously the way to go. You can work at a coffee shop, travel while still having your setup, or collaborate easily with others by bringing your machine along.

Desktops, on the other hand, are designed for a fixed location. This means more setup freedom — you can use bigger monitors, full-sized keyboards, professional audio interfaces, and studio-grade speakers without worrying about space or battery life. But moving a desktop rig often means disconnecting multiple cables and packing heavy components, making it impractical for mobile work.

So, if your music production requires frequent location changes or live performances, a powerful laptop gives you the flexibility to keep creating wherever inspiration hits.

If you mostly produce at home or in a studio space, a desktop gives you more room to build your dream setup without portability constraints.


Upgradeability and Cost: Plan Now, Grow Later

Desktops usually win in upgradeability. You can swap out your CPU, add more RAM, upgrade your storage, or even improve your audio interface with ease. This means a desktop can last longer and keep up with new software requirements without needing a full replacement.

Laptops have limited upgrade potential. You’re often restricted to upgrading only the RAM or storage, and sometimes even those are soldered onto the motherboard. When your laptop becomes outdated, you usually have to buy a new one.

Cost-wise, desktops tend to offer more performance for your money. Because you can build or choose parts separately, you often get better specs at a lower price compared to laptops.

But laptops bundle portability and power in a compact device, which can be worth the extra cost if mobility is important to you.


Choose What Fits Your Music Production Style

  • If you want maximum power, easier upgrades, and don’t mind a fixed workspace, go with a desktop.
  • If you need to produce music on the move or have limited space, a laptop is your best bet.

Both devices can handle music production well today, but knowing your needs will guide your choice.

Remember to also invest in good headphones, audio interfaces, and speakers to improve your sound quality no matter which machine you choose.

Your music production journey is personal — pick the tool that helps you create without limits!

What Is the 3 to 1 Rule When Recording?

If you are new to recording or even just getting better at it, you might have heard about the “3 to 1 rule.” It is a simple guideline that helps you avoid a common problem in audio recording called phase cancellation. Let’s break down what the 3 to 1 rule is and why you should care about it.

The 3 to 1 rule means that the distance between your recording microphones should be at least three times the distance between each mic and the sound source. This helps keep the sound clear and avoids weird echoing or weakness in your recordings.


Why Does the 3 to 1 Rule Matter?

When you record sound with more than one microphone, each mic picks up the sound waves at slightly different times. If the mics are too close to each other, these sound waves can interfere with each other. This is called phase cancellation, and it makes your recording sound hollow, thin, or unclear.

Using the 3 to 1 rule reduces phase issues by pushing the microphones far enough apart. That way, the sound arrives at each mic in ways that don’t cancel each other out. Your recordings stay bright, natural, and enjoyable.


How to Apply the 3 to 1 Rule Practically

Let’s say you are recording a singer with one mic placed very close, about 1 foot away. If you want to add a second mic, make sure it is at least 3 feet away from the first mic. This rule keeps your setup balanced and prevents bad sound effects.

If you record a drum set with multiple mics, apply the same logic: measure the distance from each mic to its source and then space the other mics accordingly. The 3 to 1 rule keeps your recording clean even with many microphones.


Tips for Using the 3 to 1 Rule

  • Measure carefully: Use a tape or ruler to check distances between mics and sources.
  • When recording groups, focus on the main sound sources first.
  • Remember the 3 to 1 ratio applies to all pairs of microphones.
  • If you hear unwanted sound, try adjusting mic distances.
  • Use the 3 to 1 rule along with proper microphone placement techniques to optimize sound quality.

By following the 3 to 1 rule, you avoid the frustration of having to fix recordings later. It saves you time and makes your sounds professional from the start.


Small Step That Makes A Big Difference

Now you know that the 3 to 1 rule is a simple but powerful way to space microphones. It keeps your recordings clear and prevents phase problems that hurt sound quality. You just measure the distance between your mic and the source, then make sure the other mics are three times farther apart. This easy rule improves your audio without complicated gear or setups.

Next time you record, remember the 3 to 1 rule to get crisp, natural, and full sound. It’s a small step that makes a big difference in your recordings and helps you sound your best.

What Computer for Home Studio?

If you’re setting up a home studio, picking the right computer is a big deal. Your computer is the heart of your setup, running your digital audio workstation (DAW), plugins, virtual instruments, and all your recordings. Choosing the wrong one can slow you down, cause crashes, or limit your creative workflow. So, what computer should you get for a home studio? Let’s break it down in a simple way that helps you make the best choice.

Why Your Computer Matters in a Home Studio

When making music or editing audio, your computer has to handle lots of data fast. It runs software that records multiple tracks, processes effects, and plays virtual instruments without lag. You need a computer that’s powerful enough to do this smoothly. Otherwise, you’ll waste time waiting, dealing with glitches, or fighting with frozen programs. A good studio computer also grows with you; it stays reliable even when your projects get bigger or more complex.

Key Things to Look for in a Home Studio Computer

Here are the most important features to consider when choosing your studio computer:

  • Processor (CPU): Think of the CPU as your computer’s brain. You want a fast, multi-core processor (like an Intel i5/i7, AMD Ryzen 5/7, or Apple M1/M2 chip) because audio software demands a lot of computing power.
  • RAM (Memory): More RAM lets your computer juggle big projects with many tracks and plugins open. Aim for at least 16GB of RAM for comfortable performance.
  • Storage: Fast storage matters! A solid state drive (SSD) is a must—it loads your programs and audio files quickly. Go with at least 512GB to 1TB so you have room for all your projects.
  • Audio Interface Compatibility: Your computer must work well with your audio interface. Check that the ports (USB, Thunderbolt) and drivers are supported.
  • Operating System (OS): Most DAWs work on Windows and macOS. Choose the OS that fits your preferred software and workflow.

Best Computer Types for a Home Studio

You basically have three computer options: laptops, desktops, and all-in-ones. Each has its perks.

Desktop Computers

Desktops often offer the best power-to-price ratio. They are easier to upgrade with more RAM or storage later on. If you want rock-solid performance and plan to stay in one spot, desktops are great. Plus, you get more ports for your gear, which can keep your setup neat.

Laptops

Laptops shine if you need mobility. You can take your studio anywhere, from gigs to different rooms at home. Modern laptops pack plenty of power. Just be sure to choose one with strong specs (fast CPU, enough RAM, and SSD storage) to avoid hiccups during sessions.

All-in-Ones

All-in-one computers combine screen and hardware in one device. They save space and look tidy. They can work for lighter studio setups but might not match the power and upgrade options of desktops or high-end laptops.

Top Computer Models for Home Studios

Here are some highly recommended computers for home studios that strike a good balance of power, price, and reliability:

  • Apple MacBook Pro (M1 or M2 chip): Excellent long battery life, powerful performance, and macOS support for popular DAWs like Logic Pro X and Ableton Live.
  • Dell XPS 15 (Windows): A solid Windows laptop with a fast processor and good RAM options, great for running large sessions in Pro Tools or FL Studio.
  • Custom-built Windows Desktop: If you’re comfortable building or buying a custom PC, you can tailor everything to your needs, from a Ryzen 7 CPU to 32GB RAM and roomy SSDs.
  • iMac 24-inch (Apple M1 chip): Combines a beautiful 4.5K display with a powerful chip, perfect for smaller studios wanting elegance and punch.

Tips to Optimize Your Home Studio Computer

Once you pick your computer, keep it running smooth by:

  • Regularly updating your OS and DAW software.
  • Closing unnecessary programs when working in your DAW.
  • Using an external hard drive for sample libraries and backups.
  • Investing in quality audio drivers for your interface.
  • Monitoring CPU and RAM usage to avoid overload.

In short, the computer you choose for your home studio should have a fast processor, at least 16GB RAM, a solid state drive, and the right OS for your DAW. Whether you pick a powerful desktop, a versatile laptop, or an all-in-one depends on your space and mobility needs. With the right machine, you’ll enjoy smooth sessions and focus more on making music. Happy recording!

What Not to Do in a Recording Studio: Essential Tips for a Successful Session

If you’ve booked time in a recording studio—or you’re thinking about it—there’s a lot to be excited for. It’s your chance to bring your music to life with expert equipment, talented engineers, and an environment dedicated to creativity. While it’s natural to focus on what you need to prepare or bring, many musicians overlook the simple mistakes that can make or break a session. If you want productive, enjoyable studio time that supports your music and your reputation, it’s just as important to know what NOT to do.

Let’s walk through the top things you should absolutely avoid doing in a recording studio.


Don’t Show Up Unprepared

Preparation isn’t just about practicing your songs—although that’s hugely important. A lack of planning or rehearsal can waste both your time and your budget. When you step into the studio, everyone expects you to be ready to perform at your best.

  • Don’t come in without knowing the material. You should have your lyrics and arrangements completely memorized. If you’re working with a band, rehearse until everyone is comfortable with every song you plan to record.
  • Don’t expect to “figure it out as you go.” Studio time is expensive, so don’t use it for basic practice or songwriting. Make sure you already have your parts finalized and polished.
  • Never forget your instrument or crucial equipment. Bring spare strings, drumsticks, cables, picks—whatever you need. If you’re a singer, bring water and anything that helps you warm up.
  • Don’t leave communication to chance. Double-check your recording schedule. Confirm start times with every person involved. Give your engineer your technical and creative needs in advance—like special instrument setups, tempos, or effects.

Unprepared musicians not only frustrate engineers and bandmates, but also risk running out of time—leaving you with rushed or unfinished tracks.


Don’t Disrespect Studio Etiquette

Recording studios are shared creative spaces, not private rehearsal rooms or home basements. You’ll be surrounded by talented professionals who are there to help, but expect courtesy in return.

  • Don’t come late or leave early unless you’ve explained in advance. Studios often book back-to-back sessions, so delays can ruin plans for other artists.
  • Never ignore the engineer’s requests. If someone asks you to be quiet, stay out of a certain area, or use headphones instead of speakers, it’s not a personal attack—it’s to make sure your session goes smoothly.
  • Don’t touch equipment without permission. Patch bays, computer systems, preamps, microphones, and mixing boards are expensive and sensitive. One wrong move can damage gear or erase hours of work.
  • Don’t eat or drink near the equipment racks. A spilled coffee can destroy thousands of dollars in electronics.
  • Never argue with the engineer about studio rules. Respect their experience; they want the best results for your recording.
    If you treat everyone in the studio with patience and respect, your session will run smoother—and you’ll be much more likely to be invited back.

Don’t Overdo Effects or Expect Magic

The urge to sound “huge” or “pro” can lead to common mistakes around both gear and expectations. Recording technology is powerful, but it’s not a magic wand.

  • Don’t rely on auto-tune, excessive reverb, layers, or other digital trickery to fix basic performance problems. You’ll get a better result by nailing the takes naturally than by asking the engineer to “fix” good performances.
  • Don’t bring in new pedals, cables, drum heads, or any untested gear for the first time. Unfamiliar equipment can create technical issues, buzz, or unreliable sounds that waste everyone’s time.
  • Don’t force the mix engineer to “make it work” with muddy, out-of-tune, or poorly played tracks. The result will always be better if the original performance is locked-in and expressive.
  • Never assume the studio will have every effect or instrument you want. If you’re looking for a custom sound, bring your own gear—and make sure it’s in top condition.

Don’t Forget Studio Manners

Making music is creative and exciting, but tempers can flare when stakes and costs rise. Keep things professional and friendly with a few simple behaviors.

  • Don’t hog the talkback mic or interrupt people while they’re working. Wait for instructions and avoid shouting or making noise during takes.
  • Don’t play loudly in between takes unless asked. This isn’t a place for casual jamming. Engineers often need silence to check equipment, make adjustments, or discuss the next step.
  • Don’t invite extra friends or guests unless you have explicit permission. Studios are not concert venues or places to hang out. Only essential personnel (performers, manager, producer) should be present.
  • Never get intoxicated. Alcohol or drugs might seem fun in the movies, but they only slow you down, mess up performances, and create awkward situations with professionals who want to help you do your best.
    -Friendly banter is great, but keep it light, positive, and on-topic. Arguments, ego trips, and drama won’t help you make your best art.

Don’t Ignore the Engineer’s Advice

Your studio engineer has been in more sessions than you can imagine. Their advice is based on years of experience with musicians of every style. Listen and learn.

  • Don’t ignore input about mic placement, headphone levels, or suggested takes. Small improvements add up to a great final product.
  • Don’t repeatedly ask to redo takes for minor reasons. Trust the engineer’s instincts about when a part is solid.
  • Don’t micromanage every second with non-stop feedback. Let the pros do their job—especially during mixing or editing.
  • Never resist feedback about your tone, timing, or energy. Studio speakers and control rooms will reveal things you never hear in the jam space.

Don’t Waste Time with Unnecessary Takes

Perfectionism is common, but endless takes can drain your wallet and wear out your energy.

  • Don’t obsessively “chase” perfect takes if you’re already capturing the song’s spirit. Sometimes early takes have a natural energy that over-polishing can lose.
  • Don’t restart entire songs over tiny slip-ups that can easily be edited out. Trust your team’s editing and comping skills.
  • Don’t experiment wildly during valuable studio time unless you have lots of budget left. Save that for demos or home recordings.

Don’t Skimp on File Management or Backups

Many horror stories from recording studios come from lost sessions and vanished files—not bad performances.

  • Don’t forget to make periodic file backups, especially before and after important changes.
  • Don’t leave the studio without your final mixes, stems, or session files. Back them up to multiple drives or cloud storage immediately.
  • Never assume the studio will keep your files forever. Servers get cleaned out, and hard drives fail—always take control of your data.

Don’t Assume Every Studio Experience is the Same

Every recording studio has its own quirks, procedures, and personalities. Walk in with an open mind and a desire to learn.

  • Don’t compare one studio’s workflow to another—adapt and be flexible.
  • Don’t demand every engineer use the same plugins, mics, or arrangements you saw in a video. Trust their judgment for the space you’re in.
  • If the engineer suggests a simpler setup, or a change of plan, don’t dig in your heels. Some studios thrive using minimal gear and a speedy workflow.

Don’t Ignore Studio Policies

Studios have clear policies for payment, overtime, cancellations, and behavior.

  • Don’t show up late or try to extend your session at the last second—there might be another band on the calendar.
  • Don’t wait until the end before discussing costs or timelines. Make sure you understand your contract before you start.
  • Never leave a mess, or ignore instructions about trash, food, or security.

Don’t Leave Without Listening Back

You might be exhausted, but never walk away from a session without a playback.

  • Don’t assume every part sounds good without carefully listening in the control room.
  • Don’t skip on final notes or adjustments—give your feedback, but do it respectfully and efficiently.
  • Don’t rush out before you’re sure you’ve captured everything you need. Missing one little part can mean another expensive session down the road.

Making the Most of Your Studio Time

Recording in a professional studio is a big investment in your music and your career. The biggest thing you shouldn’t do is take it for granted. The more you respect the space, the people, and the process, the better your results—and your reputation—will be.

Remember: Don’t show up unprepared, and don’t bring drama. Don’t disrespect the space or the engineers, and don’t over-complicate the recording process. If you treat the studio as a temple for your creativity, rather than a playground or a party, you’ll set yourself up for an experience that’s rewarding, productive, and fun. Respect everyone, do the work, and let the magic happen!

How to Set Up a Recording Studio at Home

Setting up a home recording studio is an exciting project that lets you capture your creativity, experiment with sound, and produce professional-quality music or podcasts right from your own space. You don’t need to break the bank or have a huge room to get started. With the right approach, you can create a studio that fits your needs, your budget, and your style.

1. Choose the Right Room for Your Studio

The first step is picking the perfect spot in your home. You want a room that’s quiet, away from noisy streets, and not too close to busy household areas like the kitchen or living room. Bedrooms, basements, or spare rooms often work well. Look for a space with minimal echo and little outside noise, because these factors can make a big difference in your recordings.

If you have options, go for a room with carpeted floors and soft furnishings, as they help absorb sound and reduce unwanted reflections. Avoid rooms with lots of windows or hard surfaces, since these can bounce sound around and make mixing more difficult. You don’t need a huge space—a small, cozy room can be perfect for recording vocals, instruments, or podcasts.

2. Plan Your Studio Layout

Once you’ve chosen your room, think about how you’ll arrange your gear. Place your desk or recording table against a short wall, not in the center of the room, to help with sound balance. Leave space behind your chair for sound to travel and avoid placing your setup directly against a wall or in a corner.

Keep your main equipment—computer, audio interface, and monitors—within arm’s reach. If you’re recording vocals or instruments, make sure there’s enough space to move comfortably and set up a microphone stand. Try to keep cables tidy and out of the way to avoid tripping hazards and messy setups.

3. Essential Equipment You Need

You don’t need to buy every piece of fancy gear right away. Here’s a list of the essentials to get your home studio up and running:

  • Computer: A reliable computer is the heart of your studio. You can use a desktop or laptop, as long as it has enough processing power and storage for recording and editing audio files.
  • Digital Audio Workstation (DAW): This is the software you’ll use to record, edit, and mix your music or podcasts. Popular DAWs include Ableton Live, FL Studio, Logic Pro, GarageBand, and Pro Tools. Many offer free trials or entry-level versions.
  • Audio Interface: This device connects your microphones and instruments to your computer. It converts analog signals into digital audio and usually offers better sound quality than your computer’s built-in sound card.
  • Microphone: Start with a good-quality condenser microphone for vocals and acoustic instruments. If you’re recording podcasts or voiceovers, a dynamic microphone can be a great choice.
  • Headphones: Closed-back headphones are ideal for recording because they prevent sound from leaking into the microphone. They also help you hear details when mixing.
  • Studio Monitors: These speakers are designed for accurate sound reproduction. While headphones are great, monitors let you hear your mix as it really sounds in the room.
  • Mic Stand and Pop Filter: A sturdy mic stand keeps your microphone steady, and a pop filter helps reduce plosive sounds (like “p” and “b”).
  • Cables: You’ll need XLR cables for microphones and instrument cables for guitars or keyboards. Get cables long enough for your setup but avoid excessive slack.

4. Sound Treatment: Make Your Room Sound Great

You don’t need to turn your room into a professional studio, but a few simple changes can make a big difference. Hang thick curtains or blankets over windows and bare walls to absorb sound. Place a rug on hard floors to reduce echo. You can buy affordable foam panels or bass traps online, or even make your own with dense foam or insulation covered in fabric.

Place foam panels at the “first reflection points”—the spots on the walls and ceiling where sound bounces directly from your speakers to your ears. This reduces unwanted echoes and makes your recordings sound clearer. Don’t overdo it; too much foam can make your room sound “dead.” Aim for a balanced, natural sound.

5. Setting Up Your Gear

Now it’s time to connect everything. Here’s a simple step-by-step guide:

  1. Set up your desk or table and place your computer and audio interface on it.
  2. Connect your audio interface to your computer via USB, Thunderbolt, or FireWire, depending on the model.
  3. Install your DAW software and any necessary drivers for your audio interface.
  4. Plug your microphone into the audio interface using an XLR cable. Attach the pop filter to the mic stand and position it a couple of inches from the microphone.
  5. Connect your headphones and studio monitors to the audio interface. Make sure you know how to switch between them for recording and mixing.
  6. Arrange your monitors at ear level, forming an equilateral triangle with your head for the best stereo image.
  7. Test everything by recording a short sample and playing it back. Adjust levels as needed.

6. Recording Your First Track

You’re ready to start recording! Open your DAW and create a new project. Set the input channel to match your microphone or instrument. Adjust the gain on your audio interface so your recording levels are strong but not clipping (going into the red).

If you’re recording vocals, stand about six inches from the microphone and use the pop filter to reduce plosives. For instruments, experiment with mic placement to find the best sound. Record a few takes and listen back to choose the best performance.

Don’t worry if things aren’t perfect right away—practice makes perfect, and you’ll get better with each session.

7. Mixing and Editing Your Recordings

After recording, it’s time to mix and edit. Use your DAW to cut out mistakes, adjust timing, and add effects like reverb or compression. Listen to your mix on both headphones and monitors to catch any issues.

Keep your mixes simple at first. Focus on balancing the levels of each track and making sure everything sounds clear. You can always add more effects and polish as you gain experience.

8. Tips for a Productive Home Studio

  • Keep your studio tidy: A clean space helps you focus and keeps your gear in good condition.
  • Back up your recordings: Save your work to an external drive or cloud storage to avoid losing your projects.
  • Take breaks: Long sessions can tire your ears. Step away every hour to stay fresh.
  • Experiment: Try new recording techniques, instruments, or effects to keep things fun and creative.
  • Learn from others: Watch tutorials, read articles, and join online forums to pick up tips and tricks.

9. Budget-Friendly Studio Upgrades

As you get more comfortable, you might want to upgrade your gear. Here are some ideas that won’t break the bank:

  • Add a MIDI keyboard for making beats or playing virtual instruments.
  • Buy a second microphone for recording instruments or backup vocals.
  • Invest in better monitors for more accurate mixing.
  • Get a reflection filter for your microphone to improve vocal recordings in untreated rooms.
  • Upgrade your DAW to unlock more features and plugins.

10. Common Mistakes to Avoid

  • Skipping sound treatment: Even basic soundproofing improves your recordings.
  • Overbuying gear: Start simple and upgrade as you learn what you really need.
  • Ignoring cable management: Tidy cables prevent accidents and make your studio look professional.
  • Recording at high volumes: Loud recordings can distort. Keep levels moderate and monitor with care.
  • Not reading manuals: Take time to learn your gear and software for the best results.

11. Frequently Asked Questions

Do I need expensive equipment to start?
No, you can start with affordable gear and upgrade as you go.

Can I use my bedroom as a studio?
Absolutely! Just treat the room for sound and keep it organized.

What’s the best DAW for beginners?
GarageBand (Mac) and Audacity (Windows/Mac) are user-friendly and free.

How do I avoid background noise?
Record at quiet times, use sound treatment, and keep windows closed.

Is it hard to learn mixing?
It takes practice, but online tutorials and experimenting will help you improve quickly.

12. Final Thoughts

Setting up a home recording studio is a rewarding journey that lets you bring your musical or creative ideas to life. You don’t need a huge budget or a fancy room—just a passion for sound and a willingness to learn. Start small, focus on the essentials, and enjoy the process. Your home studio will grow with you as your skills and creativity develop.

Now, go ahead—set up your studio, hit record, and let your creativity flow!