How Can I Improve the Sound of My Home Studio?

Creating a home studio that sounds professional is more achievable than ever, but it takes more than just buying gear. You need to focus on your room’s acoustics, the layout of your equipment, and the quality of your recording chain. Let’s break down the most effective ways you can transform your home studio into a space where your creativity shines and your mixes sound great everywhere.

Optimize Your Room’s Acoustics

Treat the Room First, Not Last

You might think your gear is the most important part of your studio, but the room itself has a huge impact on your sound. Even the best microphones and monitors can’t fix a room that’s full of echoes, boomy bass, or weird reflections. Start by treating your room with a mix of absorption and diffusion.

  • Acoustic Panels: Place large acoustic panels on your walls to absorb mid and high frequencies. This reduces echoes and makes your mixes clearer and more accurate.
  • Bass Traps: Bass frequencies build up in the corners of your room, making mixes sound muddy. Install thick bass traps in all corners to absorb these low frequencies and tighten up your sound.
  • Diffusers: Once you’ve controlled the reflections and bass, add diffusers to the rear wall. Diffusers scatter sound waves, preventing harsh echoes and creating a more natural, lively sound in your studio.
  • Rugs and Curtains: Hard floors reflect sound, so lay down a thick rug to reduce unwanted reflections. Use curtains over windows to control brightness or deaden the room as needed.

Smart Speaker and Listening Position

Where you put your monitors and where you sit can make or break your mixes.

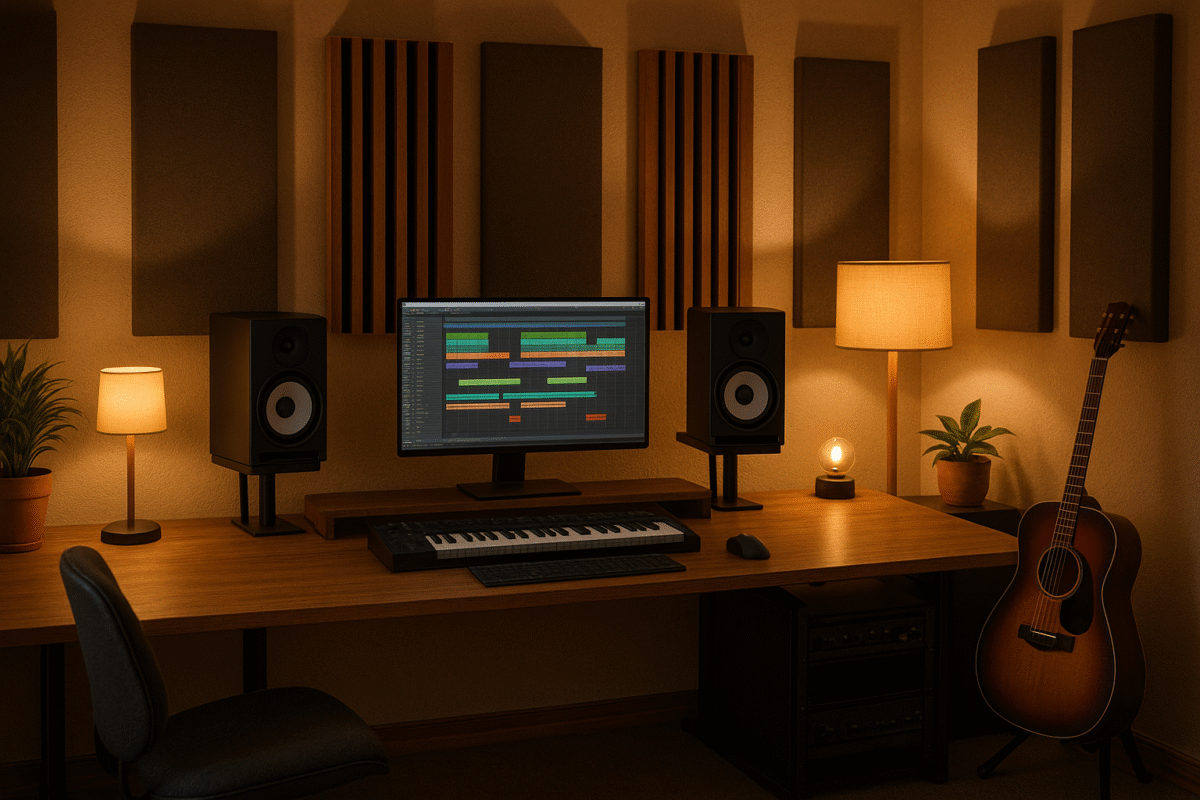
  • Monitor Placement: Place your studio monitors so they form an equilateral triangle with your head. Your ears should be at the same height as the tweeters. This setup puts you in the “sweet spot” for balanced stereo imaging.
  • Room Symmetry: Keep your setup as symmetrical as possible. Uneven room shapes or furniture placement can cause reflections that skew your perception of the mix.
  • Distance from Walls: Don’t place your monitors right up against the wall. Leave some space (at least a few inches) to avoid bass build-up and reflections that can color your sound.

Analyze and Adjust

Use free room analysis software like REW to identify problem frequencies and pressure zones in your room. This helps you place your acoustic treatment and monitors more effectively, and ensures you’re hearing an accurate representation of your music.

Build a Clean Recording Chain

Invest in Quality Where It Counts

A great-sounding studio starts with a clean signal path from your microphone to your computer.

  • Microphone and Preamp: A decent microphone and preamp can make a huge difference. Even if you’re on a budget, choose a mic known for clarity and a preamp that adds minimal noise.
  • Audio Interface: Your audio interface converts analog signals to digital. Look for one with clean preamps and reliable drivers. This ensures your recordings are clear and free from distortion.
  • Cables and Power: Use quality cables to avoid unwanted noise. Power your gear from a clean source and avoid running audio cables parallel to power cables to minimize interference.

Monitor With Confidence

  • Studio Monitors: Invest in accurate studio monitors rather than regular speakers. Monitors are designed for critical listening and will reveal problems in your mix you might miss otherwise.
  • Headphones: Closed-back headphones are great for tracking vocals or instruments without bleed. Open-back headphones can be used for mixing, but always check your mixes on monitors as well.

Room Correction Tools

Some monitors come with built-in room correction, or you can use software solutions like Sonarworks or IK Multimedia’s ARC System. These tools analyze your room and adjust your monitor output to compensate for acoustic problems, helping your mixes translate better to other listening environments.

Control the Noise: Soundproofing and Isolation

Keep Unwanted Noise Out (and In)

Soundproofing is different from acoustic treatment. While treatment improves sound quality inside the room, soundproofing keeps outside noise from getting in and your music from leaking out.

  • Doors and Windows: Use solid-core doors and seal any gaps with weatherstripping. Heavy curtains over windows help block outside noise.
  • Walls and Ceilings: For serious soundproofing, consider adding mass-loaded vinyl behind drywall, or use sound isolation clips and double layers of drywall. Seal all gaps with acoustic caulk to prevent sound leaks.
  • Floors: If you’re in an apartment or upstairs room, add thick carpets or rugs to reduce sound transmission through the floor.

Isolate Your Gear

Vibrations from stands or desks can travel into your microphones or monitors, coloring your sound.

  • Monitor Isolation Pads: Place your monitors on foam pads or dedicated isolation stands to prevent vibrations from reaching your desk or stands.
  • Shock Mounts: Use shock mounts for microphones to reduce vibrations from footsteps or bumps.

Fine-Tune Your Workflow and Layout

Ergonomics and Inspiration

A well-organized studio helps you work faster and stay inspired.

  • Cable Management: Keep cables tidy and out of the way to avoid tripping hazards and accidental disconnections.
  • Lighting: Use soft, adjustable lighting to create a comfortable atmosphere. Avoid harsh overhead lights that can cause eye strain.
  • Furniture: Choose a comfortable chair and a desk that fits your gear. Keep your most-used equipment within easy reach.

Experiment and Listen

No two rooms are the same. Move your monitors, desk, or acoustic panels around and listen to the difference. Sometimes moving your listening position just a few inches can improve your sound dramatically.

Mix at Lower Volumes

Mixing at lower volumes helps prevent ear fatigue and lets you hear a more accurate balance of frequencies. If your mix sounds good at a low volume, it will usually sound great when played loud.

Upgrade Thoughtfully

Don’t Chase Gear—Chase Results

It’s tempting to buy new gear, but focus on improving your room and workflow first. Once you’ve treated your room and optimized your setup, then consider upgrading your microphone, interface, or monitors for even better results.

Keep Learning

The best producers are always learning. Watch tutorials, read articles, and experiment with new techniques. Your ears will improve over time, and so will your mixes.

Improving the sound of your home studio is a journey, not a single step. By treating your room, optimizing your setup, investing in a clean recording chain, and controlling noise, you’ll create a space where your music can truly shine. Every small improvement adds up, so keep tweaking, listening, and enjoying the process. Your future self—and your listeners—will thank you.
How Can I Record Professional Audio at Home?

Recording professional audio at home is easier than ever. You no longer need a fancy studio or expensive gear to get crisp, clear sound. With the right setup, some basic knowledge, and a few smart tricks, you can produce audio that sounds like it was made in a pro studio—right from your bedroom, living room, or office.

Let’s break down everything you need to know to record professional audio at home, step by step.


Why Sound Quality Matters

Before you start, let’s talk about why professional audio is important. Whether you’re making a podcast, recording music, or creating YouTube videos, great sound instantly boosts your credibility. Listeners are more likely to stick around if your audio is clear, balanced, and free from distracting noise.


1. Set Up Your Recording Space

Your recording environment is just as important as your equipment. Even the best microphone can’t fix a noisy, echo-filled room. Here’s how you can create a space that works for you:

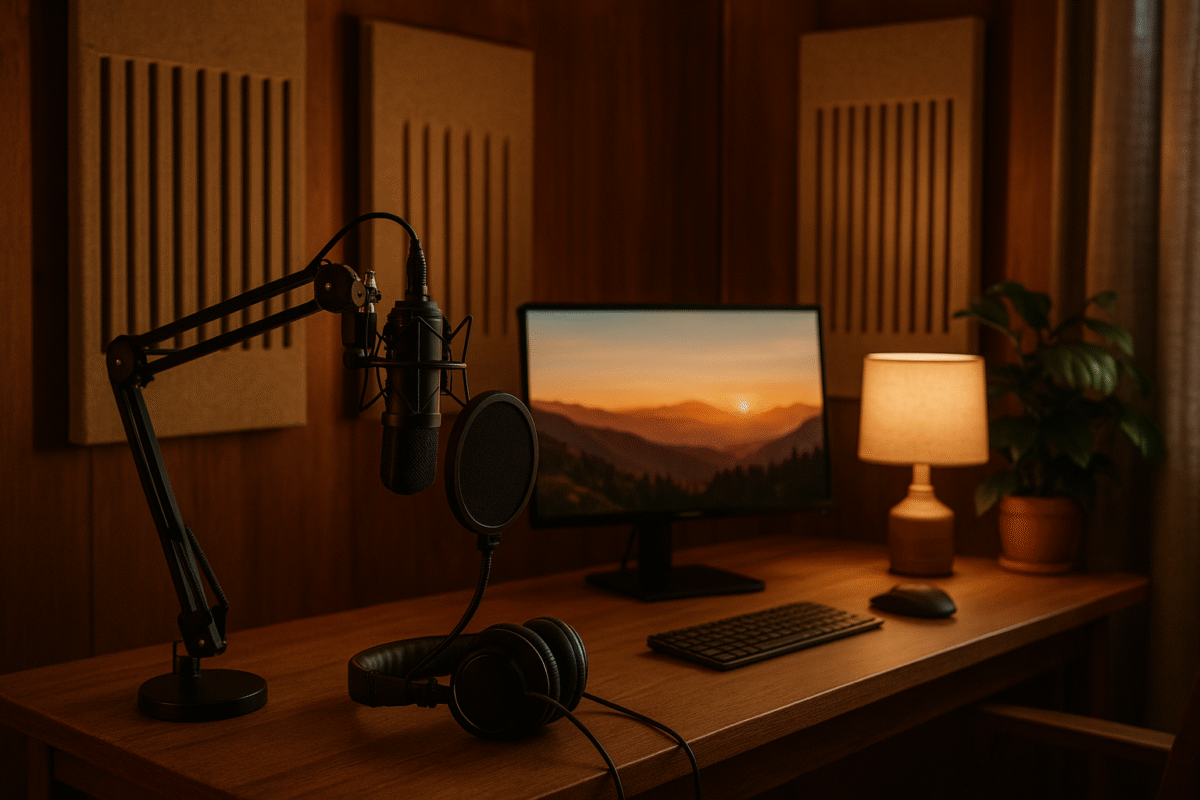
  • Choose a quiet room away from busy streets, loud appliances, and household traffic.
  • Soft surfaces absorb sound, so add rugs, curtains, and cushions to reduce echo.
  • Avoid rooms with lots of bare walls or windows, as these reflect sound and create unwanted reverb.
  • If you can, record in a walk-in closet or a small room filled with clothes. Clothes act as natural sound absorbers.
  • Consider using foam panels or portable isolation booths if you want to take things up a notch.

You don’t need to spend a fortune. Simple adjustments like closing doors and windows, turning off fans, and silencing your phone can make a big difference.


2. Pick the Right Equipment

You don’t need the most expensive gear, but you do need the right tools for the job. Here’s a checklist of what you’ll need:

Microphones

  • USB Microphones: Plug directly into your computer. Great for beginners and easy to use.
  • XLR Microphones: Offer better sound quality and flexibility but require an audio interface.

For voice work, a condenser microphone is usually best. For instruments or live performances, dynamic microphones are more robust.

Audio Interface

If you’re using an XLR mic, you’ll need an audio interface. This device connects your microphone to your computer and converts analog sound into digital signals. Look for interfaces with clean preamps and low noise.

Headphones

Closed-back headphones let you hear your recording clearly without sound leaking into the mic. Avoid using speakers while recording to prevent feedback.

Pop Filter

A pop filter sits between you and the microphone. It blocks out harsh “p” and “b” sounds, making your voice sound smoother.

Mic Stand or Boom Arm

Holding a microphone in your hand introduces noise. Use a stand or boom arm to keep your mic stable and at the right height.

Optional Extras

  • Acoustic panels or foam to further treat your room.
  • Reflection filters to block unwanted room noise.
  • Shock mounts to reduce vibrations from your desk or stand.

3. Learn Basic Recording Techniques

With your space and equipment ready, it’s time to record. Here’s how to get the best sound:

Microphone Placement

  • Keep the mic 6–12 inches from your mouth for a balanced sound.
  • Angle the mic slightly off-center to reduce harsh consonants.
  • Use the pop filter to maintain a consistent distance.

Set Your Levels

  • Speak or play at your normal volume and watch the input meter in your recording software.
  • Aim for levels that peak around -6 dB. This gives you enough headroom to avoid distortion.
  • If your levels are too high, lower the gain on your audio interface or microphone.

Monitor Your Sound

  • Wear headphones while recording to catch problems early.
  • Listen for background noise, hums, or pops and adjust your setup as needed.

Minimize Noise

  • Turn off noisy electronics and appliances.
  • Ask others in your home to keep quiet during your session.
  • Record at times when your environment is naturally quieter.

4. Choose the Right Recording Software

There are plenty of free and paid options for recording and editing audio. Here are some popular choices:

  • Audacity: Free, open-source, and user-friendly.
  • GarageBand: Great for Mac users and beginners.
  • Adobe Audition: Professional-grade with advanced features.
  • Reaper: Affordable and highly customizable.

Pick software that feels comfortable and meets your needs. You can always upgrade later as your skills grow.


5. Edit and Polish Your Audio

Recording is just the first step. Editing helps you create a polished, professional sound.

Basic Editing Steps

  • Cut out mistakes, long pauses, and background noises.
  • Use noise reduction tools to remove hums or static.
  • Apply EQ (equalization) to balance your voice or instrument.
  • Add compression to even out volume levels.
  • Normalize your audio so it’s loud enough but not distorted.

Most software comes with built-in tools for these tasks. There are also plenty of tutorials online to help you master editing basics.


6. Export and Share Your Audio

Once you’re happy with your recording, export it in a high-quality format. WAV files are best for archiving, while MP3s are great for sharing online.

  • Choose a sample rate of 44.1 kHz and a bit depth of 16 or 24 bits for most projects.
  • Double-check your file for any glitches or mistakes before sharing.

7. Tips for Consistently Great Recordings

  • Record several takes and pick the best one.
  • Keep your gear clean and well-maintained.
  • Save your work often and back up your files.
  • Practice speaking or playing naturally to sound relaxed and confident.
  • Keep learning—experiment with new techniques and tools as you go.

8. Troubleshooting Common Problems

Even the pros run into issues. Here’s how to fix some common problems:

  • Background Noise: Add more soft surfaces, use noise reduction in editing, or record at quieter times.
  • Echo or Reverb: Move closer to the mic, add more acoustic treatment, or use a reflection filter.
  • Distortion: Lower your input gain or move further from the mic.
  • Muffled Sound: Check your mic placement and make sure nothing is blocking the microphone.

9. Frequently Asked Questions

Do I need expensive equipment to record professional audio at home?
No, you can get great results with budget-friendly gear and a well-treated room.

Can I use my phone to record audio?
Yes, modern smartphones can record decent audio, especially with an external microphone.

How do I get rid of background noise?
Treat your room, use noise reduction tools, and record in quiet environments.

What’s the best microphone for beginners?
USB condenser microphones are easy to use and sound great for most home setups.


Recording Professional Audio at Home

Recording professional audio at home is all about preparation, practice, and a little bit of patience. Focus on your environment, choose the right gear, and learn the basics of recording and editing. With these tips, you’ll be well on your way to creating audio that sounds polished, professional, and ready to share with the world.

Remember, everyone starts somewhere. Don’t be afraid to experiment and have fun with the process. Your next great recording is just a session away!

How to Record at Home with Studio Quality

Recording music or vocals at home used to mean compromising on sound, but not anymore. With the right tools, setup, and a bit of know-how, you can achieve professional, studio-quality results right from your bedroom, basement, or living room. This guide will walk you through everything you need to know to make your home recordings sound crisp, clear, and ready for the world to hear.


1. Setting Up Your Recording Space

Before you even think about microphones or software, your room matters. Sound quality starts with the environment you record in, so let’s make sure your space helps you, not hurts you.

Choose the Right Room

You don’t need a fancy studio, but you do want a quiet space. Avoid rooms with lots of hard surfaces, like kitchens or bathrooms, since they cause unwanted echoes. Bedrooms, closets, or any room with carpets, curtains, and soft furniture will absorb sound better and reduce reflections.

Treat Your Room Acoustically

You don’t have to spend a fortune on acoustic panels. Thick blankets, rugs, and even pillows can help dampen sound. Place them on walls, over windows, and in corners to minimize echo and reverb. If you’re serious, consider buying a few foam panels for the walls behind and to the sides of your recording spot.

Minimize Noise

Turn off fans, air conditioners, and electronics that hum or buzz. Let your housemates know you’re recording so they can keep things quiet. The less background noise, the cleaner your recording will be.


2. Choosing the Right Equipment

You don’t need to break the bank to get studio-quality sound, but investing in a few key pieces of gear will make a huge difference.

Microphone Matters

A good microphone is the heart of any home studio. For most vocals and instruments, a large-diaphragm condenser microphone is your best bet. It captures detail and nuance, making your recordings sound rich and professional. If you’re on a budget, USB microphones are surprisingly good these days, but XLR microphones paired with an audio interface offer better quality and flexibility.

Audio Interface

An audio interface connects your microphone to your computer and converts analog sound into digital data. Look for an interface with clean preamps and at least one XLR input. Popular models from Focusrite, PreSonus, and Universal Audio are reliable and easy to use.

Headphones and Monitors

Closed-back headphones are essential for recording, as they prevent sound from leaking into your microphone. For mixing, a pair of studio monitors (speakers) will give you a more accurate picture of your sound, but good headphones can work if you’re short on space or budget.

Cables and Stands

Don’t overlook the basics. Use quality XLR cables for your microphone and a sturdy stand to keep it steady. A pop filter (the mesh screen in front of the mic) will help tame harsh “p” and “s” sounds, giving your vocals a polished finish.


3. Recording Techniques for Studio Quality

Now that your space and gear are sorted, it’s time to focus on how you record. Technique is just as important as equipment.

Microphone Placement

Where you place your microphone can make or break your sound. For vocals, position the mic about six inches from your mouth, slightly off to the side to avoid plosive pops. For instruments, experiment with distance and angle until you find the sweet spot—closer for warmth, farther for more room sound.

Set Proper Levels

Before you hit record, check your input levels. Aim for peaks around -6dB to -3dB on your interface or recording software. This leaves headroom and prevents distortion. If your signal is too hot (too loud), turn down the gain.

Record Multiple Takes

Don’t settle for the first try. Record several takes and pick the best one, or even combine the best parts of different takes. This is how the pros do it, and it gives you options when you start editing.

Monitor While Recording

Always wear headphones while recording to hear exactly what’s being captured. This helps you catch issues like background noise, weird echoes, or performance mistakes before they ruin your best take.


4. Editing and Mixing for a Professional Sound

Recording is only half the battle. Editing and mixing turn your raw tracks into polished, studio-quality masterpieces.

Use Quality Recording Software

Digital Audio Workstations (DAWs) like Ableton Live, Logic Pro, FL Studio, or even free options like Audacity or Cakewalk, let you record, edit, and mix your tracks. Pick one that feels intuitive to you.

Clean Up Your Tracks

Start by trimming away silence and background noise. Most DAWs have noise reduction tools to help clean up any hums or hisses. Use fades to smooth out the start and end of each clip.

EQ and Compression

Equalization (EQ) lets you shape the tone of your recording. Cut out low-end rumble, tame harsh highs, and boost frequencies that make your vocals or instruments shine. Compression evens out volume differences, making your performance sound smooth and professional.

Add Effects Sparingly

Reverb and delay can add depth and space to your recordings, but use them with care. Too much can make your track sound muddy. Start with subtle settings and increase only if it helps the sound.

Balance Your Mix

Listen to your track as a whole and adjust the volume of each element so nothing is too loud or too quiet. Pan instruments left or right to create space and clarity.

Reference Other Tracks

Compare your mix to professional songs in a similar style. This helps you identify what’s missing or what needs adjusting in your own mix.


5. Final Touches: Mastering Your Home Recording

Mastering is the final polish that makes your track sound great on any device. While professional mastering engineers use specialized tools, you can get solid results at home.

Use Mastering Plugins

Many DAWs include mastering presets or plugins that make the process easier. These tools can add clarity, loudness, and balance to your final mix.

Check Your Mix Everywhere

Listen to your finished song on headphones, speakers, your car stereo, and even your phone. If something sounds off, go back and tweak your mix until it sounds good everywhere.

Export in High Quality

When you’re happy with your track, export it in a high-quality format like WAV or AIFF. Only use MP3 if you need a smaller file for sharing online.


6. Common Mistakes and How to Avoid Them

Even with great gear and a solid setup, it’s easy to make mistakes that hurt your sound. Here’s how to dodge the most common pitfalls.

  • Recording too hot: Always leave headroom so your tracks don’t distort.
  • Ignoring room acoustics: Even the best mic can’t fix a bad-sounding room.
  • Overusing effects: Less is more. Use reverb, delay, and compression to enhance, not overwhelm.
  • Not backing up files: Save your work often and keep backups on an external drive or cloud storage.

7. Quick Checklist for Studio-Quality Home Recording

  • Quiet, treated room
  • Quality microphone and audio interface
  • Closed-back headphones
  • Proper mic placement
  • Clean, well-edited tracks
  • Balanced mix with subtle effects
  • Mastered and exported in high quality

A Quality Home Studio is Achievable

Recording at home with studio quality is totally within your reach. With the right space, gear, and a little practice, you can create tracks that sound like they were made in a pro studio. Focus on your environment, invest in key equipment, and take your time with recording and mixing. Soon, you’ll be amazed at the results you can achieve—right from the comfort of your own home. Happy recording!

How quiet should a recording studio be?

When you step into a recording studio, you expect a world where every sound is crisp, clear, and free from unwanted noise. But how quiet should a recording studio really be? If you’re dreaming of professional-quality audio, or just want to elevate your home studio, understanding the right level of quiet is the first step. Let’s dive into what makes a studio truly silent, why it matters, and how you can achieve the perfect hush for your recordings.


Why Does Studio Quietness Matter?

You might wonder why recording studios obsess over silence. The answer is simple: every unwanted sound-whether it’s a humming air conditioner, distant traffic, or footsteps upstairs-can ruin a perfect take. Microphones are sensitive, picking up even the tiniest noises. If your studio isn’t quiet enough, you’ll spend hours editing out distractions or, worse, have to re-record.

A quiet studio lets you:

  • Capture every detail in vocals and instruments.
  • Mix and master with confidence, knowing you’re hearing only the music.
  • Avoid frustration from background noise sneaking into your tracks.

What’s the Ideal Noise Level for a Recording Studio?

So, how quiet is quiet enough? The answer comes down to decibels (dB), the unit used to measure sound levels. For recording studios, the goal is to keep background noise as low as possible-ideally, so low you barely notice it at all.

Professional studios aim for a noise floor between 15 and 25 dBA.


Here’s what that means:

  • 15 dBA is extremely quiet-think of a whisper or the sound of leaves rustling.
  • 25 dBA is still very quiet, similar to a quiet library or a calm rural night.

For comparison, a typical home is around 40 dBA, and a busy street can be 70 dBA or more. In a studio, even 30 dBA can be too loud, especially when recording soft vocals or acoustic instruments.

Why dBA?
The “A” in dBA means the measurement is weighted to reflect how the human ear hears different frequencies. This scale is perfect for studios, as it focuses on the types of noise most likely to interfere with recordings.


How Can You Measure Your Studio’s Quietness?

You don’t need fancy equipment to check your studio’s noise level. Here’s how you can do it:

  1. Use a Sound Level Meter:
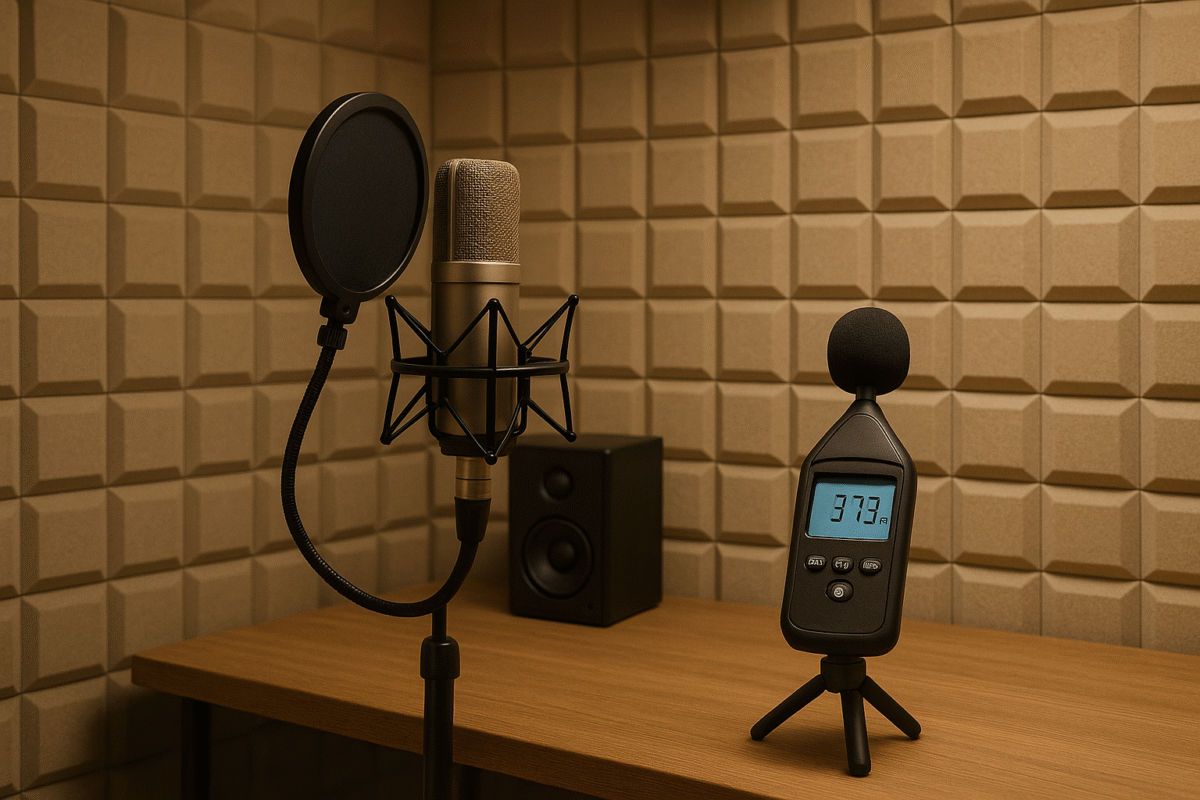
    Many affordable meters are available online. Place the meter in the center of your studio, set it to dBA, and watch the reading.
  2. Try a Smartphone App:
    While not as accurate as a dedicated meter, apps can give you a rough idea. Just search for “sound level meter” in your app store.
  3. Listen Carefully:
    Turn off all equipment and sit quietly. Can you hear a hum, buzz, or hiss? If you can, your microphone probably can, too.

What Causes Noise in a Recording Studio?

Even if your studio seems quiet, hidden noises can sneak into your recordings. Here are the most common culprits:

  • HVAC Systems: Air conditioners and heaters often create a constant hum.
  • Computers and Electronics: Fans, hard drives, and power supplies can all make noise.
  • Outside Sounds: Traffic, airplanes, neighbors, and even birds can be picked up by sensitive mics.
  • Building Structure: Footsteps, plumbing, and vibrations from other rooms can travel through walls and floors.

How to Make Your Studio Quieter

If your studio isn’t as quiet as you’d like, don’t worry. There are plenty of ways to reduce noise and get closer to that ideal 15-25 dBA range.

1. Soundproof the Room

Soundproofing stops outside noise from getting in and prevents your music from leaking out. Here’s what you can do:

  • Seal Doors and Windows: Use weatherstripping or acoustic seals to close gaps.
  • Add Mass to Walls: Heavy drywall or mass-loaded vinyl can block sound.
  • Decouple Surfaces: Floating floors and double walls prevent vibrations from traveling.
  • Install Acoustic Panels: While these absorb echoes, they can also help with minor noise reduction.

2. Silence the Equipment

  • Choose Quiet Gear: Look for computers and audio interfaces designed to run silently.
  • Move Noisy Items Out: Place loud equipment in a separate room or closet.
  • Use Isolation Boxes: Enclose noisy gear in soundproof boxes.

3. Control Environmental Noise

  • Schedule Wisely: Record at times when outside noise is lowest.
  • Ask for Quiet: Let family or roommates know when you’re recording.
  • Use Rugs and Curtains: Soft furnishings can help absorb sound and reduce noise.

What If You Can’t Get Your Studio That Quiet?

Not everyone has the budget or space to build a perfectly silent studio. If you’re working from home or in a less-than-ideal space, here are some tips:

  • Get Close to the Mic: The closer you are, the less background noise the mic will pick up.
  • Use Directional Microphones: Cardioid or shotgun mics focus on your voice and ignore sounds from other directions.
  • Record During Quiet Hours: Early mornings or late nights are often the quietest times.
  • Edit Carefully: Noise reduction plugins can help clean up minor background sounds.

Remember, the quieter your studio, the easier your recording and editing process will be.


Real-World Examples: How Quiet Are Famous Studios?

Professional studios are built to be as silent as possible. Here’s what you’ll find in some of the world’s best spaces:

  • Abbey Road Studios (London): Rooms are designed to keep noise below 20 dBA, with thick walls and floating floors.
  • Electric Lady Studios (New York): Custom HVAC systems and double doors keep noise to a minimum.
  • Home Studios of Top Producers: Many top producers use home studios with soundproofing, quiet computers, and careful scheduling to achieve noise levels below 25 dBA.

These studios invest heavily in silence because it pays off in recording quality.


FAQs

How do I know if my studio is quiet enough?

If your noise floor is consistently below 25 dBA, you’re in great shape. If you hear hums or hisses, you may need to make improvements.

Can you record in a room with 30 dBA noise?

Yes, but you may notice background noise in quiet passages. For most music, 25 dBA or lower is ideal.

Is total silence possible?

Total silence (0 dBA) is impossible outside of a vacuum. Aim for “as quiet as possible” within your means.

What’s more important: soundproofing or acoustic treatment?

Both matter, but for noise control, soundproofing is key. Acoustic treatment improves sound quality inside the room.


Your Path to a Quieter Studio

A truly quiet recording studio is the secret ingredient behind every great track. While 15-25 dBA is the gold standard, don’t stress if you’re not there yet. Every improvement you make-whether it’s sealing a door, moving a computer, or recording at a quieter time-brings you closer to professional results.

Remember, the quieter your studio, the more your music will shine. So grab a sound meter, listen closely, and start making your space as silent as your creativity demands. Happy recording!

How Much Does a Good Music Studio Cost?

Are you dreaming of recording your first song, producing a full album, or launching a podcast? One of the first questions you’ll face is: How much does a good music studio cost? Whether you want to build your own, rent a professional space, or book time for a single project, understanding the costs involved is key to planning your creative journey. This guide will break down the real numbers, the factors that influence them, and help you decide what’s right for your needs and budget.


What Influences the Cost of a Music Studio?

Before you dive into the numbers, you should know that music studio prices aren’t one-size-fits-all. The cost depends on several factors:

  • Location: Studios in big cities like Los Angeles or New York usually charge more due to higher overhead costs. Studios in smaller towns often offer more affordable rates without sacrificing quality.
  • Equipment: High-end studios with the latest technology and vintage gear will cost more. The better the gear, the higher the price tag.
  • Expertise: Experienced sound engineers and producers can charge premium rates for their skills. You’re not just paying for a space-you’re investing in expertise.
  • Studio Type: Are you looking for a home setup, a professional commercial studio, or something in between? Each comes with its own price range.
  • Size and Space: The bigger and more acoustically treated the space, the higher the cost. Converting a spare room at home is much cheaper than building a commercial facility from scratch.
  • Acoustic Treatment and Soundproofing: Good sound is all about the room. Proper soundproofing and acoustic panels can add thousands to your budget, but they’re essential for professional results.

Now, let’s break down the costs for different types of music studios.


Home Music Studio: Affordable and Flexible

If you want to create music at home, you’re in luck-technology has made home studios more accessible than ever. But how much will you really spend?


Home Studio Cost Breakdown

Basic Home Studio: $300 – $5,000

  • Includes a computer, microphone, audio interface, headphones, and basic speakers.
  • Entry-level microphones start around $80, but high-quality ones can reach $800 or more.
  • Your choice of computer matters-a high-end Apple iMac will cost more than a basic PC.
  • Simple soundproofing and acoustic panels can be DIY or purchased for $1,000 or less.

Mid-Range Home Studio: $5,000 – $25,000

  • Upgrades include better microphones, advanced audio interfaces, premium studio monitors, and more comprehensive acoustic treatment.
  • Add-ons like pop filters, mic stands, and software can increase your investment.

High-End Home Studio: $25,000 – $30,000+

  • Professional-grade gear, top-tier soundproofing, and a dedicated room or building

What’s Included in a Home Studio?

  • Computer or laptop (DAW software)
  • Audio interface
  • Microphones (one or more)
  • Studio monitors (speakers)
  • Headphones
  • Cables, stands, and accessories
  • Acoustic panels and soundproofing

Is a Home Studio Right for You?

If you’re just starting out, a basic home studio is often all you need. You can always upgrade as your skills and needs grow. Many successful artists started in their bedrooms-what matters most is your creativity and dedication.


Professional Music Studio: The Gold Standard

For those who want the best sound, access to top engineers, or a space to record a band or orchestra, a professional studio is the way to go. But be prepared: the costs are much higher.


Building a Professional Studio

  • Small Professional Studio: $30,000 – $100,000
    • Bare-bones setup, limited equipment, but professional-grade sound.
  • Mid-Size Studio: $100,000 – $400,000
    • More space, better gear, advanced mixing consoles, and high-end soundproofing.
  • Large, World-Class Studio: $500,000 – $1,000,000+
    • Custom-built spaces, legendary gear, and everything a top artist could want.

Cost Breakdown

ItemEstimated Cost Range
Studio Space (build/renovate)$12,000 – $150,000+
Mixing Console$18,000 – $85,000+
Audio Processing Equipment$35,000+
Studio Monitors$2,500 – $10,000+ (pair)
Microphones$1,300 – $3,000+ (each)
Recording BoothsUp to $3,400+
Acoustic Treatment$1,000 – $20,000+
Furniture & Decor$500 – $2,000+

Note: These are ballpark figures. Costs can vary widely depending on your choices and location


Renting or Booking Time in a Professional Studio

If building isn’t for you, you can rent a studio by the hour, day, or week.

Hourly Rates: $25 – $300+ per hour

  • Basic studios: $30 – $50/hour
  • Professional studios: $100 – $300/hour or more
  • World-class studios: $500/hour and up

Daily or Weekly Packages

Many studios offer discounted block rates, which are ideal for longer projects.

Additional Fees

Some studios charge extra for technical assistance, instrument rentals, or mixing and mastering services.

Example of Cost to Record a Song

  • Simple Demo: $100 – $500
  • Professional Single: $1,000 – $5,000
  • Full Album: $10,000 – $50,000+ (depending on studio time, production, and mixing needs).

Key Questions to Ask Before You Book or Build

You want to get the most value for your money. Here’s what you should consider:

  • What’s my budget? Be honest about what you can afford. There’s no shame in starting small.
  • What are my goals? Are you making demos, releasing music commercially, or just having fun?
  • How much time do I need? Booking by the hour is great for quick projects, but block rates can save you money for longer sessions.
  • What equipment do I need? Don’t overspend on gear you won’t use. Focus on essentials first.
  • Do I need an engineer or producer? Their expertise can make a big difference in your final product.
  • What’s included in the price? Always ask about extras like mixing, mastering, or equipment rental.

Tips to Save Money on Your Studio

  • Start small and upgrade later. Many artists build their studios piece by piece as their needs grow.
  • Buy used equipment. You can find great deals on second-hand gear.
  • DIY soundproofing. With some creativity, you can make your own acoustic panels and save hundreds.
  • Prioritize essentials. Get a good microphone and audio interface first, then add extras as needed.
  • Book off-peak hours. Some studios offer discounts for late-night or weekday sessions.

Quick Reference: Studio Cost Comparison

Studio TypeStartup/Build CostHourly Rental CostWho’s It For?
Basic Home Studio$300 – $5,000N/ABeginners, hobbyists
Mid-Range Home$5,000 – $25,000N/ASemi-pros, serious creators
High-End Home$25,000 – $30,000+N/APros, commercial projects
Small Pro Studio$30,000 – $100,000$50 – $150Bands, indie artists
Mid/Large Pro Studio$100,000 – $1,000,000+$150 – $500+Major label, film, orchestras

What Does a “Good” Music Studio Cost?

A “good” music studio means different things to different people. For some, it’s a cozy home setup under $1,000. For others, it’s a fully-equipped commercial space costing hundreds of thousands. The right choice depends on your goals, your budget, and the sound you want to achieve.

  • Home studios can be built for as little as $300 if you’re resourceful, but a solid setup with quality gear will run $2,000 to $10,000.
  • Professional studios start around $30,000 to build and can easily exceed $1 million for world-class facilities.
  • Renting studio time is a flexible option, with rates from $30 to $300 per hour, depending on the studio’s reputation, location, and equipment.

No matter your budget, remember: the most important investment is your creativity and passion. Start with what you have, learn as you go, and upgrade when you’re ready. Your music deserves to be heard-so get started and make some noise!

How to Fix Poor Sound Quality Recording: A Comprehensive Guide

When it comes to audio production, one of the most frustrating problems creators face is poor sound quality. Whether you’re a podcaster, musician, voiceover artist, or video creator, high-quality audio can make or break your project. If you’re struggling with recordings that sound muffled, distorted, or have background noise, don’t worry—there are practical steps you can take to enhance your audio quality. Here’s how to fix poor sound quality recording effectively.

Identify Common Sound Quality Issues

Before diving into the solutions, it’s essential to pinpoint what’s wrong with your recording. Common sound quality issues include:

  • Background noise: Unwanted sounds like fans, traffic, or echoes.
  • Distortion: Overmodulation causing harsh, grating audio.
  • Muffled sound: Audio that lacks clarity and sounds like it’s covered.
  • Low volume levels: Recordings that are too quiet.
  • Hiss and hum: Persistent background noise, often due to poor electrical grounding.

By identifying the specific problem, you can tailor your approach to achieve the best results.

Optimize Your Recording Environment

Your recording environment plays a pivotal role in the quality of your audio. Here’s how to make improvements:

  • Soundproof the space: Use acoustic panels, foam, or even blankets to dampen echo and absorb sound reflections.
  • Minimize background noise: Turn off fans, air conditioners, and other electronic devices that can contribute to noise.
  • Choose a quiet location: Record away from windows or in a secluded room to avoid outside noise pollution.

Use the Right Equipment

Investing in reliable audio equipment can drastically improve your recording quality.

a.) Microphones:

  • Dynamic microphones are great for environments with more background noise.
  • Condenser microphones capture richer sound but are more sensitive to surroundings.

b.) Audio interfaces: Ensure you use a good-quality interface to connect your microphone to your computer, which can prevent audio degradation.
c.) Headphones: Use closed-back headphones to monitor sound without leakage.

Tip: A pop filter can help reduce plosive sounds, such as “p” and “b,” which can distort audio.

Set Proper Recording Levels

Incorrect recording levels are a common cause of poor sound quality. Here’s how to set your levels for the best outcome:

  • Maintain a safe recording level: Aim for peaks at around -6dB. This provides a buffer to avoid clipping and distortion.
  • Avoid clipping: This occurs when input levels are too high and causes distortion. Adjust the input gain on your interface or recording device as needed.
  • Monitor with headphones: This helps you hear any issues in real-time.

Use Proper Microphone Techniques

Microphone placement and technique can have a significant impact on sound quality.

  • Maintain consistent distance: Keep a consistent distance of 6–12 inches from the microphone to ensure stable volume and tone.
  • Avoid excessive movement: Moving around too much can result in uneven sound.
  • Angle the microphone: Positioning the microphone slightly off-center can reduce the chances of plosive sounds directly impacting the mic diaphragm.

Post-Production Fixes

Even with the best preparation, recordings might still need editing to reach a professional standard. Here’s how to enhance your audio using software:

a.) Noise reduction:

  • Use software like Audacity, Adobe Audition, or iZotope RX to remove background noise.
  • Most digital audio workstations (DAWs) come with noise gate plugins to suppress unwanted noise below a certain threshold.

b.) Equalization (EQ):

  • Adjust the EQ settings to brighten or deepen the sound. Reducing the low frequencies (e.g., 80Hz and below) can help clear up muddiness.
  • Boost higher frequencies (e.g., 3kHz–8kHz) to add clarity.

c.) Compression:

Apply compression to even out volume discrepancies within the recording. This ensures that the quieter parts are audible without the louder parts overpowering them.

d.) Reverb control:

Too much reverb can make audio sound distant and unclear. Apply subtle reverb if needed or reduce it with plugins to keep the sound clean.

Tip: Always listen to your edits on different devices (e.g., headphones, speakers, smartphones) to ensure consistent quality.

Advanced Techniques for Superior Sound

For those seeking further refinement, advanced tools and techniques can be used:

  • De-essing: This technique helps reduce harsh “s” sounds that can be distracting.
  • Multi-band compression: Control specific frequency ranges separately for more detailed dynamic adjustments.
  • Audio restoration plugins: Tools like iZotope RX can repair clicks, pops, and other imperfections in recordings.

Best Practices for Future Recordings

To maintain a high standard of audio quality moving forward, follow these practices:

  • Routine equipment checks: Inspect your equipment regularly for wear or malfunction.
  • Update software: Ensure your DAW and plugins are up-to-date for optimal performance.
  • Practice good recording habits: Spend a few minutes testing levels and experimenting with mic placement before starting the actual recording.

FAQs About Fixing Poor Sound Quality Recording

How can I eliminate background noise without affecting audio quality?

Use a noise reduction tool sparingly and apply it in multiple light passes rather than one aggressive application to preserve sound quality.

What’s the best DAW for audio editing?

Popular options include Audacity (free), Adobe Audition, and Reaper, each offering robust features for audio enhancement.

How do I prevent clipping during recording?

Monitor your input levels closely and ensure they peak around -6dB. Adjust the gain accordingly and test before recording.

Can I fix distorted audio?

While it’s hard to completely fix distorted audio, software like iZotope RX has tools to help reduce some of the harshness.

Why do my recordings sound muffled?

Check your microphone placement and room acoustics. Muffled sound can often be due to poor positioning or reflections in the recording environment.

What’s the best way to avoid hiss and hum?

Ensure proper grounding of your audio equipment and check your cables for wear. Applying a noise gate can also help minimize persistent hiss.


Achieving high-quality audio requires both preparation and technical knowledge. By optimizing your environment, choosing the right equipment, employing correct techniques, and mastering post-production tools, you can transform poor sound quality into a polished, professional result. Keep refining your process, and you’ll find that great sound is within your reach.

How Do I Find the Perfect Background Music?

Choosing the right background music can transform your content from ordinary to captivating, whether you’re producing a video, podcast, or presentation. It’s a critical aspect that helps set the mood, engage your audience, and communicate your message more effectively. Here’s an in-depth guide on how to find the perfect background music.

Understand Your Project’s Purpose

Before diving into music selection, it’s essential to understand the project’s goals. Are you trying to inspire, inform, entertain, or create suspense? The purpose influences the type of music that will best support your content.

a. Video Projects

  • Vlogs: Upbeat, catchy tunes enhance energy and retain viewer interest.
  • Documentaries: Subtle, atmospheric music underscores important narratives without overshadowing the content.

b. Podcasts

  • Interview-based podcasts: Light background music should not disrupt conversations but subtly fill pauses.
  • Storytelling podcasts: Music can be more dynamic to reflect different story elements.

c. Business Presentations

Soft, non-distracting instrumental tracks add professionalism and maintain focus on the spoken content.

Know Your Audience

The audience’s demographics and preferences will shape your music choice. A younger audience might appreciate modern pop or electronic beats, while an older demographic may respond better to classical or soft rock. Always align your background music with what resonates best with your target listeners or viewers.

Choose the Right Music Genre

Matching the music genre with the content’s theme is crucial. Here’s how to pick the best genre for different scenarios:

  • Motivational Content: Uplifting music with a fast tempo like electronic or pop.
  • Relaxation or Meditation: Soft piano or ambient music helps induce calmness.
  • Corporate Presentations: Instrumental jazz or light classical music lends an air of sophistication.

Leverage Online Music Libraries

Finding the perfect track is easier with the right tools. Here are some top platforms where you can explore diverse music:

a. Royalty-Free Music Libraries

These platforms offer tracks that you can use with a one-time fee or even for free, depending on the license:

  • Epidemic Sound: Offers an extensive range of genres and moods, perfect for commercial projects.
  • Artlist.io: Known for high-quality, licensed music suitable for both small and large projects.
  • Pixabay Music: A free option that provides a decent selection of tracks for personal and non-commercial use.

b. Subscription-Based Services

For creators who need frequent access to varied music:

  • AudioJungle: Purchase individual tracks from a vast library.
  • Soundstripe: A subscription service with unlimited downloads, ideal for regular content producers.

Consider Licensing Requirements

Understanding music licenses is vital to avoid potential copyright issues. Here’s a brief breakdown:

    • Royalty-Free: Pay once, use indefinitely without additional fees.
    • Creative Commons: Free, but may require attribution depending on the license type.
    • Public Domain: No copyright restrictions; you can use these tracks freely.

    Match Music to the Content’s Emotion

    Emotionally driven music can deepen engagement. Identify the primary emotion you wish to evoke and choose music that aligns with that mood. Here’s a quick guide:

    • Joy and Energy: Upbeat and fast-paced music with major chords.
    • Tension and Drama: Slow, ominous music, often in minor keys.
    • Sorrow and Reflection: Soft, slow melodies, often with piano or strings.

    Adapt Music for Seamless Integration

    The volume and transitions of background music play a significant role in maintaining professionalism:

      • Volume Control: Keep background music at a lower volume than spoken content to ensure clarity.
      • Smooth Transitions: Edit music to fade in and out, preventing abrupt starts or ends that disrupt the viewer’s experience.

      Check for Music Compatibility

      Ensure that your chosen music doesn’t clash with voiceovers or sound effects. Use audio editing software like Adobe Audition or Audacity to balance all audio elements seamlessly.

      Use Music That Builds Progression

      For longer videos or presentations, background music that evolves can maintain interest. Start with a simple melody and introduce variations or layers as the content progresses.

      Test Before Finalizing


      Before publishing, test how the music sounds across different devices (e.g., headphones, speakers, and mobile phones). This ensures consistent audio quality and clarity.

      Create a Music Cue Sheet

      If you’re using multiple tracks, make a cue sheet detailing the track names, composers, and durations. This can be helpful for maintaining organization and credits.

      Get Feedback

      Ask colleagues or a small focus group for their opinions on the chosen music. Fresh perspectives can reveal how well the music enhances or distracts from the main content.

      Adjust for Different Platforms

      Tailor your background music strategy according to where you’re publishing:

      • YouTube: Be mindful of Content ID claims; use YouTube’s audio library for free, safe-to-use music.
      • Podcasts: Choose music that doesn’t overpower spoken words, especially important for audio-only formats.
      • Social Media: Short-form videos benefit from music with impactful beginnings to quickly engage viewers.

      Reuse and Repurpose Music Wisely

      When creating series or sequels, consider using variations of the same music theme. This creates a brand identity while maintaining novelty.

      Stay Updated with Trends

      Music trends evolve, and staying up-to-date helps maintain relevancy, especially for social media content. Popular trends can influence how audiences perceive your videos and audio projects.

      FAQ

      Can I use popular songs for my video?

      Typically, popular songs are copyrighted and require explicit permission or licensing. Consider royalty-free music as an alternative.

      What’s the best free music source?

      Pixabay Music and YouTube’s Audio Library offer high-quality free tracks suitable for most projects.

      How do I ensure music doesn’t overpower my voiceover?

      Lower the volume of the background track and use audio editing software to mix the audio correctly.

      Is attribution always required for Creative Commons music?

      Not always, but many licenses do require it. Check the specific terms for each track.

      How do I credit music in my video or podcast?

      Typically, include the music title, artist, and source in the video description or end credits.

      Can I modify background music for my content?

      Yes, but make sure the license allows for modifications. Always read the licensing agreement carefully.

      What gives the best audio quality?

      When it comes to achieving the best audio quality, several factors play significant roles, from the type of audio equipment used to the file formats and environmental considerations. This guide aims to demystify these aspects, helping you understand what influences sound quality and how to optimize it for your needs.


      The Basics of Audio Quality

      Audio quality refers to the accuracy and clarity of sound that audio equipment produces. It encompasses various attributes such as frequency response, dynamic range, and signal-to-noise ratio. The ultimate goal is to reproduce sound as faithfully as possible to its original recording.


      Key Components Influencing Audio Quality

      A. Audio Source and Format

      The quality of an audio file directly impacts what you hear. Here’s a look at different audio formats:

      • Lossless Formats: These include FLAC, ALAC, and WAV. They preserve the audio data without compression, offering superior sound quality. For audiophiles, lossless formats are the go-to for ensuring minimal loss of detail.
      • Lossy Formats: MP3 and AAC are popular due to smaller file sizes. However, they achieve this by compressing audio and sacrificing some sound fidelity.

      Recommendation: For the best audio quality, opt for lossless formats whenever possible, especially for critical listening.

      B. Audio Equipment

      High-quality audio equipment is essential for superior sound reproduction. Here’s what to consider:

      • Headphones and Earphones: Over-ear headphones generally provide better sound quality than earbuds due to their larger drivers and better sound isolation. Brands like Sennheiser, Bose, and Sony are known for their high-end models that offer crystal-clear sound.
      • Speakers: For home audio systems, floor-standing speakers and studio monitors offer a fuller range of sound compared to compact speakers.
      • DACs (Digital-to-Analog Converters): These devices convert digital audio into analog signals, impacting audio quality. High-quality DACs help maintain the integrity of the original sound.

      Tip: Pairing a high-quality DAC with excellent headphones or speakers can dramatically enhance your listening experience.


      Acoustic Environment: The Hidden Player

      The environment in which you listen to audio can drastically affect sound quality. Room acoustics, including the size, materials, and layout, determine how sound waves behave.

      • Acoustic Treatment: Using foam panels, bass traps, and diffusers can mitigate issues like echo and reverb, creating a more controlled listening space.
      • Positioning: The placement of speakers and the listener’s location relative to them influence sound clarity. A symmetrical setup in a room can prevent imbalances in the audio output.

      Bitrate and Sample Rate: How They Matter

      • Bitrate: Measured in kilobits per second (kbps), bitrate indicates the amount of data processed per second of audio. Higher bitrates (e.g., 320 kbps for MP3s) yield better sound quality.
      • Sample Rate: Measured in Hertz (Hz), this defines how many times per second audio is sampled. CDs typically use 44.1 kHz, but higher sample rates (48 kHz or 96 kHz) can provide more detailed sound reproduction.

      Balancing Audio Quality and Storage

      Lossless audio formats are more storage-intensive than lossy ones. However, as technology evolves and storage becomes cheaper, choosing higher-quality files is increasingly practical. Streaming services like Tidal and Amazon Music HD cater to audiophiles by offering high-resolution streams.


      Connectivity: Wired vs. Wireless

      • Wired Connections: These provide the most stable and interference-free audio transmission. Using high-quality cables ensures minimal signal degradation.
      • Wireless Connections: Bluetooth audio has improved with codecs such as aptX HD and LDAC, which support higher bitrates for better sound quality. However, true audiophiles often prefer wired setups for the best results.

      Audio Amplifiers and Their Role

      An amplifier boosts the signal sent to your headphones or speakers. High-end audio setups often benefit from dedicated amplifiers that can drive speakers or headphones with higher impedance, ensuring full dynamic range and clarity.


      Popular Myths About Audio Quality

      • “Higher Volume Equals Better Quality”: This is a common misconception. Playing audio too loudly can distort sound and damage your hearing over time.
      • “All Lossless Formats Are the Same”: While formats like FLAC and WAV are both lossless, FLAC is compressed to save space, while WAV files are not. The difference in audio quality, however, is typically negligible to the human ear.

      Real-World Tips for Enhancing Audio Quality

      • Upgrade Your Cables: High-quality gold-plated audio cables can reduce signal loss and improve sound clarity.
      • Keep Software Updated: Ensure your audio drivers and playback software are up to date for optimal performance.
      • Avoid Overprocessing: Using too many EQ adjustments can degrade audio quality. Aim for minimal processing to preserve the original sound.

      Choosing the Right Setup for Your Needs

      Consider the following setups based on listening preferences:

      • Casual Listeners: A pair of reliable mid-range headphones (e.g., Audio-Technica or JBL) and streaming from a high-quality service.
      • Audiophiles: High-resolution digital audio files, a dedicated DAC, and top-tier headphones or studio monitors.
      • Home Theater Enthusiasts: A surround sound speaker system paired with a high-definition receiver for immersive audio.

      FAQs About Audio Quality

      Does high-resolution audio make a noticeable difference?

      For most listeners, the difference may not be significant, but audiophiles with trained ears and high-end equipment can detect improved detail and depth in high-resolution audio.

      Are noise-canceling headphones good for audio quality?

      Yes, especially for environments with background noise. However, some audiophiles prefer headphones without active noise cancelation to avoid potential distortion.

      Is there a point where bitrate improvements stop making a difference?

      Yes, beyond 320 kbps, most listeners find it difficult to perceive a notable improvement, as diminishing returns set in.

      Can wireless earbuds offer the best audio quality?

      Modern wireless earbuds with advanced codecs can come close, but they still generally fall short of high-end wired solutions.

      Do I need an amplifier for headphones?

      It depends on your headphones’ impedance. High-impedance models benefit from an amplifier to reach their full potential.

      How can I improve my car’s audio quality?

      Upgrading the car speakers, adding a subwoofer, and using high-quality audio files can enhance the listening experience.


      Achieving the best audio quality involves a combination of the right equipment, proper settings, and optimal file formats. Whether you are an audiophile or a casual listener, understanding these elements can elevate your sound experience to new heights.

      How to Soundproof a Home Studio: A Complete Guide

      Creating a home studio is an exciting project, whether you’re a musician, podcaster, or content creator. However, soundproofing is essential to ensure your recordings are clean and free from external noise. This guide will walk you through the key steps to soundproof your home studio effectively.

      1. Choose the Right Space

      The first step in soundproofing is selecting the best room for your studio. Ideally, pick a space with:

      • Minimal windows and doors.
      • Solid walls (avoid rooms with thin or hollow walls).
      • A location far from noisy areas like kitchens or busy streets.

      A basement or an interior room often works best because they naturally reduce noise transmission.

      2. Soundproof the Door and Windows

      Doors and windows are common weak points for sound leakage. Here’s how you can address them:

      Doors

      • Upgrade to a solid-core door if possible. These are denser and block more sound than hollow-core doors.
      • Install door sweeps at the bottom of the door to seal gaps where noise can enter.
      • Use soundproof blankets or acoustic panels on the door for additional insulation.

      Windows

      • Add heavy curtains or soundproof window inserts to reduce outside noise.
      • Consider installing double-glazed windows for better sound isolation.
      • Seal any gaps around the window frames with acoustic caulk to prevent sound leakage.

      3. Treat the Walls and Ceiling

      Soundproofing your walls and ceiling is crucial since these surfaces allow sound to pass through easily.

      Good: Basic Wall Treatment

      • Use mass-loaded vinyl (MLV) behind drywall to create a dense barrier that blocks sound transmission.
      • Seal all gaps and cracks with acoustic caulk to prevent noise from sneaking through small openings.

      Better: Add Isolation Clips

      • Install sound isolation clips like RSIC-1® clips on your wall studs. These clips separate drywall from the building structure, reducing vibrations and airborne noise.
      • Add a layer of 5/8-inch drywall over the clips for improved results.

      Best: Double Drywall with Green Glue

      • Apply Green Glue between two layers of drywall to dampen sound vibrations further. This method can boost your wall’s Sound Transmission Class (STC) rating significantly, making it ideal for professional-grade studios.

      For ceilings, follow similar steps:

      • Use isolation clips and channels to decouple the ceiling from the floor above.
      • Avoid recessed lighting (e.g., canned lights), as they create gaps for sound to escape.

      4. Focus on the Floor

      Floors are often overlooked in home studio projects but can impact overall soundproofing:

      • Install thick carpets or rugs with dense padding to absorb impact noise.
      • For more advanced solutions, use floating floors with acoustic underlayment to isolate vibrations.

      If your studio is on an upper floor, floor treatment becomes even more important to prevent noise from traveling below.

      5. Acoustic Treatment for Better Sound Quality

      While soundproofing keeps unwanted noise out, acoustic treatment enhances the quality of sound within your studio.

      Absorptive Panels

      • Place acoustic foam or fiberglass panels on walls and ceilings to reduce echoes and reflections.
      • Position panels strategically behind speakers and on sidewalls where first reflections occur.

      Bass Traps

      • Install bass traps in room corners to absorb low-frequency sounds that tend to build up in these areas.
      • Bass traps improve clarity in recordings by reducing muddiness caused by excessive bass frequencies.

      Diffusers

      • Use diffusers on back walls or ceilings to scatter sound waves evenly across the room.
      • This creates a more natural-sounding environment, especially in larger studios.

      6. Seal Gaps and Cracks

      Even small gaps can let significant amounts of noise in or out. To seal them:

      • Use acoustic caulk around outlets, vents, and any cracks in walls or ceilings.
      • Cover air vents with acoustic foam if they’re not essential for ventilation.

      Pay attention to details—these small fixes can make a big difference!

      7. Build an Isolation Booth (Optional)

      If you frequently record vocals or instruments, consider building an isolation booth within your studio:

      • Use dense materials like MDF (medium-density fiberboard) for walls.
      • Line the interior with acoustic foam or panels for maximum absorption.

      Isolation booths are particularly useful if external noise levels are high or if you need precise control over recordings.

      8. Consider Professional Solutions

      If DIY methods aren’t enough, professional-grade solutions may be necessary:

      • Install pre-made soundproof doors with high STC ratings for maximum isolation.
      • Work with an acoustics expert to design custom solutions tailored to your space.

      9. Test and Adjust

      Once you’ve implemented these steps, test your studio by recording audio at different times of day:

      • Listen for any remaining noise issues and identify their sources.
      • Adjust treatments as needed—sometimes moving a panel or sealing an overlooked gap can solve lingering problems.

      Soundproofing a home studio requires effort but is well worth it for high-quality recordings. By addressing doors, windows, walls, ceilings, floors, and acoustics strategically, you can create a professional-grade recording environment right in your home.

      Whether you’re working on music, podcasts, or videos, these tips will help you achieve clean audio free from distractions. Happy recording!

      What Are the 3 Things That Affect Audio Quality?

      Audio quality is essential whether you’re listening to music, watching a movie, or working on a professional recording. Understanding what influences audio quality can make a significant difference in how sound is experienced. In this comprehensive guide, we explore the three primary factors that affect audio quality.


      Bitrate

      What is Bitrate?

      Bitrate refers to the number of bits processed per unit of time in audio playback. It is measured in kilobits per second (kbps) and determines the amount of data used to represent the audio. The higher the bitrate, the more data is transmitted, resulting in better sound quality.

      How Does Bitrate Affect Audio Quality?

      • Higher Bitrate: Produces clearer, more detailed audio by allowing a broader range of sound frequencies and dynamic ranges to be accurately reproduced. Examples include lossless formats like FLAC (Free Lossless Audio Codec) or WAV (Waveform Audio File).
      • Lower Bitrate: Can result in compressed audio where certain sound details are lost, leading to noticeable artifacts like “warbling” or diminished clarity. Common formats include MP3s at lower bitrates (128 kbps or lower).

      Practical Examples of Bitrate in Use

      • Streaming Services: Many platforms, such as Spotify and Apple Music, offer different audio quality settings (e.g., 128 kbps, 256 kbps, 320 kbps). Choosing higher settings enhances the listening experience.
      • Recording Standards: In professional environments, lossless formats with high bitrates are preferred to ensure the integrity of the sound.

      Tips for Optimal Bitrate

      • Know Your Purpose: Use a higher bitrate for professional recordings and personal music libraries. Lower bitrates may suffice for casual streaming to save bandwidth.
      • Choose the Right Format: For audiophiles, FLAC and WAV are superior due to their uncompressed nature, while MP3s provide convenience and smaller file sizes.

      Equipment

      Importance of Quality Equipment

      The tools you use to produce or listen to audio play a crucial role in its final quality. These include playback devices, speakers, headphones, and recording gear. High-quality equipment captures and reproduces sound more accurately.

      Critical Equipment that Influences Audio Quality

      • Microphones: Condenser microphones are often preferred in studios for their sensitivity and accurate sound reproduction. Dynamic microphones work better in live settings for their durability and resistance to background noise.
      • Headphones and Speakers: High-end headphones and speakers with a broad frequency range can produce more precise and fuller sound.
      • Amplifiers: For serious audiophiles, amplifiers help drive speakers or headphones, ensuring clean power delivery and better sound reproduction.

      Common Pitfalls with Equipment

      • Inferior Components: Using low-quality headphones or speakers may lead to distortion, poor sound clarity, and limited frequency response.
      • Mismatched Equipment: Pairing a high-quality sound source with low-end speakers can bottleneck the experience. Ensuring compatibility among devices is crucial for preserving audio integrity.

      Recommendations for Best Equipment

      • Entry-Level: For newcomers, investing in quality earbuds like the Audio-Technica ATH-M50x provides a good balance of cost and performance.
      • Professional: Studio monitors like the Yamaha HS8 or headphones such as the Sennheiser HD 650 offer exceptional sound accuracy.

      Environment

      How the Environment Impacts Audio Quality
      The space in which audio is produced or listened to can significantly influence sound quality. Factors like room size, acoustic treatment, and noise levels contribute to the listening experience.

      Acoustic Treatment Explained

      • Soundproofing: Prevents outside noise from entering the space and affecting the audio.
      • Acoustic Panels: Help absorb sound waves, reducing echo and reverb, leading to a cleaner, more controlled sound.
      • Bass Traps: Designed to manage low-frequency sounds that can overwhelm and distort the audio experience.

      How to Improve Your Audio Environment

      • Home Listening: Position speakers at ear level and at an equilateral triangle setup for better sound distribution.
      • Recording Studios: Use a combination of foam panels, bass traps, and diffusers to create an acoustically balanced space.
      • Portable Solutions: For those on the go, noise-cancelling headphones can mitigate environmental sounds, enhancing the audio experience in non-ideal settings.

      Practical Adjustments

      • Reducing Background Noise: Close windows, use rugs or carpets, and choose quieter times for critical listening.
      • Speaker Placement: Keep speakers at least a few inches from walls to reduce reflections and bass distortion.

      Frequently Asked Questions (FAQs)

      What is the best bitrate for high-quality audio?

      The best bitrate for high-quality audio is typically 320 kbps for compressed formats like MP3. For lossless formats, bitrates upwards of 1,411 kbps (CD quality) are ideal.

      Do expensive headphones really make a difference?

      Yes, high-quality headphones often provide better sound accuracy, wider frequency response, and less distortion compared to cheaper models.

      How does room size affect audio quality?

      Room size affects how sound waves travel and reflect. Smaller rooms may produce more immediate reflections, while larger spaces can cause echoes. Proper acoustic treatment can mitigate these issues.

      What’s the difference between soundproofing and acoustic treatment?

      Soundproofing prevents external noise from entering a room, while acoustic treatment manages sound reflections within the space to improve audio clarity.

      Why do some recordings sound different on different equipment?

      Equipment varies in how it reproduces sound. Cheaper gear may not accurately present all audio frequencies, leading to differences in perceived audio quality.

      Can software enhance audio quality?

      Yes, software like equalizers and digital audio workstations (DAWs) can adjust and enhance sound. However, these tweaks can only go so far without good source material and equipment.


      Achieving superior audio quality boils down to managing three main elements: bitrate, equipment, and environment. A high bitrate ensures rich detail in audio files, while top-tier equipment reproduces sound accurately. Meanwhile, optimizing your environment prevents audio distortion and external noise interference. By focusing on these factors, listeners can elevate their audio experience significantly.